Followers

Showing posts with label Female birthday card. Show all posts

Thursday, 7 March 2024

Orange flower

Good Morning everyone

Today im sharing the 2nd card i made for my sis-in-laws birthday

approx size 6x6"

I was sent this lovely flower die cut by a friend which i used as my starting point, i coloured it with alcohol markers. 

I made my base card using nesting dies from white card. I then die cut a frame to fit and from the inner part i embossed this with a 3D lace embossing folder, i lightly inked over the embossing with tumbled glass distress inks and around the outside edge.  I attached the white frame to the card front with 2mm foam tape and adhered the embossed panel flat into the centre. 

I adhered the flower stem into place with pva and then added the petals with glue gel for dimension, then attached the stamens.  Stamped sentiment die cut into an oval and i lightly inked the edges orange to pick up on the orange of the flower and help it stand out. Finished with some Gold gems to add some sparkle

Items Used:
Crafters companion 3D embossing folder 'ornate lace'
XL nesting die set
Sizzix oval die
Clearly besotted sentiment stamp
Distress inks - tumbled glass, wild honey
CraftUK ltd white linen cardstock

Thank you for popping by once again, i really do appreciate it. Emmax

Id love to enter the following:


Monday, 4 March 2024

Kirstys Birthday

Good Morning everyone

Today im sharing a card i made for my Sister-in-laws birthday.  Her fav colour is orange so i used this lovely orange floral paper from a 12x12 pad from the works and teamed it up with a cream cardstock so a bit softer than white.

I made a 6x6" card blank from light cream cardstock, with the fold at the top i die cut the spellbinders fancy edge die from the card front.  I cut a piece of p.paper slightly smaller and die cut the fancy edge and inlay and then adhered it to the card front. 

I added a strip of the cream card across the top edge and added alphas die cut from the same p.paper.  Birthday sentiment die cut from copper satin mirri card to finish.  

This shows the card closed, to the inside of the back of the card i added another strip of the p.paper so that when the card is closed you can see it - you can make out the sentiment a bit better on this photo too


Just showing it stood up side on

Items Used:
Spellbinder dies
Memory box alpha dies
Sizzix sentiment die 
12x12 Paper pad from the works 'nature is my home'

Thank you for popping by, i hope you all have a great week.  Hugs Emmax

Id love to enter the following:


Monday, 6 March 2023

Spring birthday

Good Morning everyone

Today im sharing the cards i made for my sister in laws birthday this week.  Her favourite colour in yellow/orange so i started off with a spring crocus


4.5x6" White gold pearl card base.  I embossed the base card with a swirly embossing folder.  I then die cut 3 cross stitched rectangles, on one of them i stamped the chocolate baroque crocus stamp,  i stamped the crocus again onto more of the pearl cardstock.  I added a watercolour background with distress inks tumbled glass & cracked pistachio, i them stencilled swirls onto all 3 panels using the same inks.  I watercoloured the extra crocus in shades of yellowy orange and cut it out and attached to the base image with glue gel.

I attached the extra 2 rectangles to the card front top left and bottom right with foam tape and then mounted the crocus panel in the middle with more foam tape.  I die cut the sentiment from scraps of burnt orange satin cardstock and added some orange gems to finish.  
 

Here you can really see the burnt orange satin card, its a shame the pearl of the cardstock doesn't show up.


I had some left over pieces so made a little happy mail card to brighten a friends day, made the same way just a lovely sentiment from magazine


and onto the 2nd card i made for my sis-in-law 

DL white base card.  I first made a background which you can see below.  Using these lovely DL dies i was given for Christmas i die cut the biggest one from my yellow background and a smaller one from white linen cardstock.  From the yellow one i cut the middle out (gutted it) as i usually do as this then gave me enough to die cut my leaves from.

I arranged the leaves onto the base and glued into place and then stamped the sentiment.  I then attached to the base card with foam tape.

and this is the background i made.   I first used brushos - lemon & gambage with cosmic shimmer pixie powders in 'mango' &  'scarlet mist' Once completely dry I then stencilled over the top with a mix of distress inks & oxide inks so it has alot of different finishes and lovely shimmer when the light catches it which makes it more interesting on the eye once die cut than just a flat inked panel.   


Items Used:
Chocolate Baroque stamp 'spring is in the air'
Simply cards & papercraft mag 240 sentiment freebie (step into spring)
Birthday sentiment stamp
Cross stitched rectangle die
DL nesting dies
concorde & ninth layering leaves die set (the leaf)
A4 swirly embossing folder
Stencils
Brushos
Pixie powders

Thank you all for stopping by, i hope its a good week for you.  Emmax


Id love to enter the following with my first crocus card

***

***

***

***


Monday, 10 January 2022

Herd of Rabbits

Good Morning everyone

Now thats a question, on going to type up this post I was trying to think what the collective term for rabbits is and found i didn't know.....Mr google and lots of reading and im not much the wiser...herd, colony, warren, flock & nest were all named...So i asked the family, being farmers one would think they would know as they have alot of wild rabbits....after alot of discussion around the Christmas table (i didn't mention google results) they weren't sure but decided it must be warren......   Although I guess as a male rabbit is a buck and female a doe then herd is more likely?  

Anyway i was given this fab tonic rabbit die set for my birthday so decided to use it to make a birthday card for my Niece and also a few more bunnies for the box.  Lizzy was 8 just before Christmas.   


This shows the front and back of the card as i decorated both sides as it only makes a small card...size approx 3x5.5"...  I dug out all the paper scraps for these.  I started with chocolate pearlised cardstock for the base of the rabbit, used  a ivory card for the body layer and decorated using the dies in the set.  Computer printed sentiments onto a very pale pink cardstock and die cut again using a label die that comes in the set.  I added glitter to the flower centre for a little bit of bling.

This shows how they easily stand up.  I die cut the body mat layer from pale cardstock to line inside to write on


A hug version, this shows 2 cards, i did the dress on the front and the male outfit on the back.  For these ones i used a ginger pearl double sided cardstock for the base card.

I also did 2 baby versions, one for a girl and one for a boy

and a get well and birthday version.  The get well sentiment die comes with the rabbits so fits perfectly. The birthday is an old justrite sentiment stamp

Items Used:
Tonic studio dies 'Bernice & Bradley Bunny' 3638e
Various paper scraps
Ginger & Chocolate pearl cardstock
Cream & Ivory cardstock
Justrite sentiment stamp
Ranger stickles glitter glue


I hope you all have a good week.  Ive not yet found my mojo after its Christmas break so still tidying up the craft stash and ive still plenty of projects to share with you😃  Stay safe. Hugs Emmaxxx


Id love to enter the following:

***

***

***


Thursday, 6 January 2022

Lever fold card

Good Morning everyone


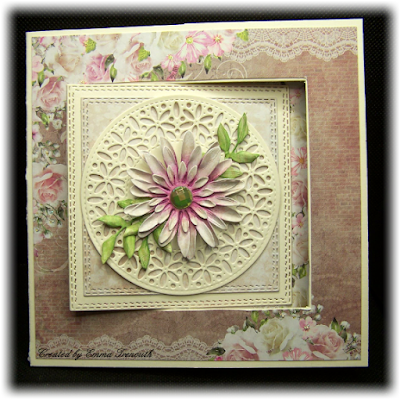
Today im sharing a lever fold card i made for my mum for her best friends birthday.  First time ive made one and as always i learnt from this first one by the mistakes.  I was given these beautiful papers by a friend, its a polish company called AltairArt, a new company to me but the quality is outstanding so i let them do the work here...


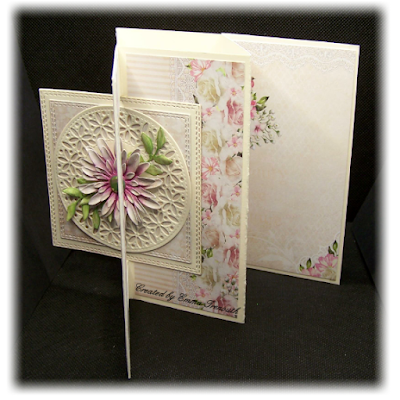
6.5x6.5" card. Using instruction i found on pinterest i made up my lever card from A3 cream cardstock, i went with cream as felt it was softer with the papers i wanted to use.  As im dangerous with a craft knife i used a square die to cut the mechanism aperture, marking where i wanted it with pencil as you only need to cut half way...... I then cut and adhered different papers to the sections and glued the 2 parts together.  
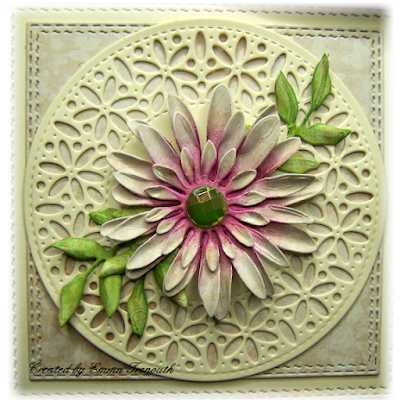
I die cut another square the same size as the aperture and glued into place, a smaller one from paper.  I die cut, inked and shaped a flower, added it to the flower with a die cut floral circle.  Gem to finish

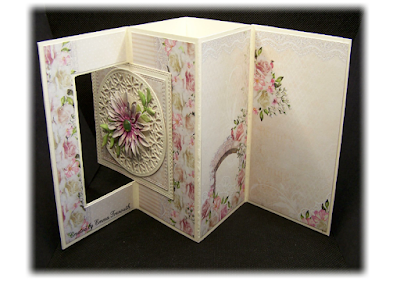
Showing it open

The inside

a close up of the flower.

Items Used:
paper pad by AltairArt 'mysterious garden'
Square dies
floral circle die
Flower dies
A3 CraftUk ltd cream cardstock
Distress inks citron, wilderness, picked raspberry, seedless preserves


Id love to enter the following with this card:


***

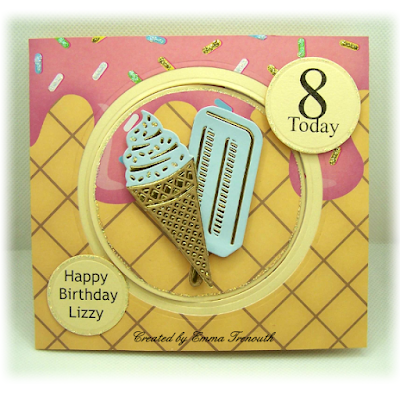
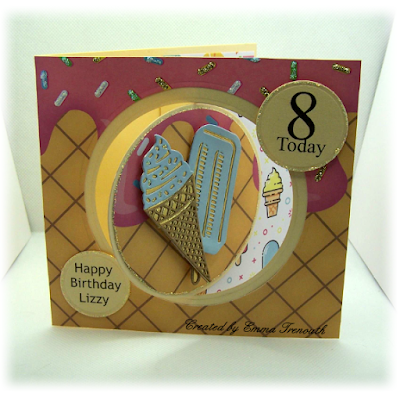
I then made a version for my niece Lizzy's 8th birthday, i found this fun ice cream themed paper in my stash and some ice cream dies too so thought it would be the ideal theme as Lizzy does love her food😁

6x5.5" card.  I made up the card using cream pearlised cardstock and a circle die for the lever action & aperture.  I covered the whole front of the card with the ice cream paper after cutting a circle out of the middle, i then used that circle to line up on the middle topper section.  I die cut and layered the ice creams using kraft, gold & pale blue card.  Computer printed sentiments die cut into circles, glued into place.

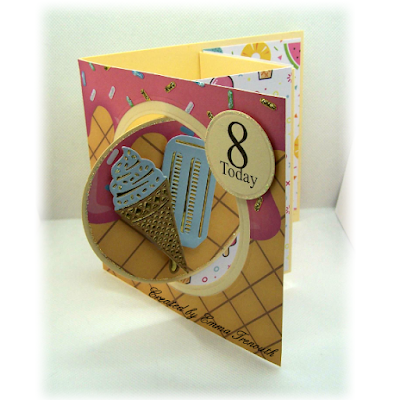
Showing it opened up, i used a different ice cream paper on the inside panels

To finish i added lots of glitter glues to the ice cream sprinkles and around the toppers

Items Used:
Old Papers from B&M
Spellbinders Circle dies
Itricut ice cream dies
Cream pearl cardstock
Kraft, blue & gold mirror cardstock
Ranger stickles glitter glues

Thank you all for stopping by once again.  I hope you all enjoy the end of the week and weekend.  Hugs Emmax


Monday, 11 January 2021

Birthday Bee

Good Morning everyone

Today im sharing the card i made for my mums birthday which was on saturday - using my favourite stamp - this fab pink ink bee stamp teamed up with chocolate baroque bee stamps & hexagon dies.  The shape was inspired by something i saw on pinterest.


I first cut small hexagons from the same paper pad, i then stencilled and stamped them (see last photo for full details)  I die cut hexagon frames using a bigger die from white card, added foam tape to the back of them.  I glued the coloured hexagons on to black cardstock in the pattern i wanted, adding the frame and leaving a small gap between them all where the black card peeks though. I then used scissors and cut around the outside edge leaving a small black border.  To create the back of the card i then drew around the front panel onto black card and cut out, added a small score line at the top and used that to glue it to the front panel - thus giving me a shaped card that stands up.

I then stamped the bees onto white card, watercoloured with distress inks and cut out.  For the big bee i stamped the wings on vellum coloured with a pale blue alcohol marker. I then arranged the bees on the card and added a stamped greeting.


A close up on the big bee

Close up showing the little bees - an old chocolate  baroque stamp set with bees in various sizes

Showing how it stands up - mum loved it - so thats good

This is the background.  After die cutting my little hexagons i attached them to scrap card with a little repositionable glue - a tape pen is great for this.  I then stamped with the extra stamps in the pink ink stamp set, adding stencilling with a gold paint that really shimmers in the light. By stamping them this way meant that the pattern was more cohesive on the finished layout. 

Items Used:
Pink Ink Bee stamps 'Bee-utiful'
Chocolate Baroque stamps 'honey bees'
Clearly besotted sentiment stamps
Teresa Collins paper pad
Stencils
Imagination Crafters starlight paint - rich gold
Distress inks - lemonade, persimmon, honey, 

Thank you all for stopping by.  I hope you all have a good week despite the situation we are all in.  Stay safe.  Hugs Emmax


Id love to enter the following:

***

***

***


***