Followers

Showing posts with label friend. Show all posts

Thursday, 17 March 2022

Spring tulips

Good Morning everyone

Spring flowers - i can't decide which is my fav as when the snowdrops come out in January they bring promise with them then we head into the cheerful yellow daffodils which brighten up a grey wet spring here in Cornwall where they often grow wild in the hedgerows and then comes the vibrancy of tulips...basically i love them all and grow them all in my little garden. 

I used this lovely little tulip in wellies die and teamed it with pastel polka dot papers....not often i go for pastel shades


5.5x6" green cardbase.  I first die cut my tulips/wellies from polka dot papers & the green card and paper pieced together.  Just adding a little shading around the wellies with a grey alcohol marker.
I die cut a border edge die from the front edge of my base card.  I then cut layers using the same die from pastel polka dot papers, you only need it deep enough to slot under the one above so only need a small stripe of the papers, i then die cut a white panel with the same die, added foam tape and adhered it to the card front leaving a little of the green base card showing at the top edge.
I added a strip across the middle of the card using the same papers/colours.  Die cut a white circle and green circle to fit the wellies and attached to the card base and then added my tulip wellies with glue gel.  Stamped sentiment to finish.


Just a close up of the tulips wellies.

***


As i had left over tulips and wellies from die cutting in the different colours i used them all up, so this is version 2.  On this one you can see the card closed shut, i added a little strip of the polka dots to the inside back edge so you can see it when the card is closed - when its stood up open you just see the green shaped edge as shown on the first photo above....hope that makes sense😀

Items Used:
Simon Says stamp ' rainboot planter'
MFT Border Edge dies
Circle dies
Clearly besotted sentiment stamps
Anna Marie crafts polka dot cardstock
Echo park paper pad ' dots & stripes'

Thank you all for stopping by.  I hope its a good end to the week & weekend for you all.  Emmax


Id love to enter the following:

***

***

***

***

***

***


Thursday, 12 August 2021

Friendship card

Good Morning everyone

Today is another acetate flower card, this time instead of die cutting the acetate i stamped onto it and cut out. 


I first coloured the acetate snippets with red & yellow alcohol inks.  I then stamped just the poppy heads onto the acetate with stazon ink - stamp on the opposite side to the one you coloured with the ink.  I stamped the whole poppy stamp again and the sentiment from the set onto white card and die cut that into a label shape.  I lightly coloured the stem with pistachio oxide ink & the butterfly with lemonade oxide and added some splatters to the background.  I stamped just the butterfly onto vellum and cut out and added on top of the one on the base leaving its wings free.  I added my acetate poppies with a touch of glue gel behind where the dark centres are so that you can't see it.
I die cut 2 of the largest label4 from white card, one i folded in half for my base.  I then glue the 2nd one on top (photo below) and then added the poppy panel on top with foam tape.

Showing it side on and how the base works, i just cut a little slice off the back where the point is on the shape so it stands up. 

and a close up - you can easily see how the acetate shines with the lights reflecting on it😁  A touch of glitter glue added to the butterfly.

Items Used:
Chocolate Baroque stamp set 'pretty poppies'
Spellbinders grand labels 4 die set
CraftUK white linen card
Acetate
Vellum
Distress Oxide inks pistachio, lemonade
Tim Holtz alcohol inks, red pepper, sunshine yellow
Ranger stickles 'diamond'

Thank you all for stopping by and all your amazing comments.  I hope you have a good week.  Hugs Emmax


Id love to enter the following:


Monday, 26 July 2021

Floating acetate cards

Good Morning all

Today im sharing 2 floating acetate cards - very hard to take decent photos of both the acetate and the foiling i used!  Using the old stash of double sided adhesive sheets again i decided to use them with a pot of cosmic shimmer aurora flakes i was given months ago which went everywhere and reminded me why my gilding flakes went to the back of the cupboard!! So i decided to just make a massive mess and use the whole tub up at once with one clean up or they would have just gone to the back of the cupboard as well!  - so i now have alot of sparkly panels for Christmas cards.....we were finding flakes around the bungalow for days after including on the cats😁 


A5 card size.  After sticking the double sided sheet to white cardstock i peeled off the other sticky side and added my die cut floral panel and then rubbed in the aurora flakes and buffed up.  I folded an A4 sheet of acetate in half and added my rose panel to the centre of the card front, leaving acetate edges all the way around gives the effect the middle panel is floating.  I die cut vellum for my flowers adding a gem centre, die cut foliage from silver mirror card and a stamped and die cut sentiment banner.  
To hide all the workings and for somewhere to write the greeting inside i cut panels of white card the same size as the rose panel on the front and glued them inside on both sides and then one on the back of the card too.

Showing it side on, you can just see the white panel inside here


Trying to show the amazing shimmer and shine of the flakes but in real life it is amazing in tones of green, blue and silver

and showing the back

***

and version 2 i made with glitter.  Going on from my last uploads about this sizzix glitter - see here if you missed it last week. I was given 3 pots, the charcoal i used last time and then this pink and orange

Made exactly the same way as the first one but just using the biodegradable glitter instead of the flakes - if i did it again i would be more careful about how i put the different colours onto the panel  - its very sparkly which sadly the photos really don't show!


Items Used:
Rose panel cutting die (brand unknown)
Flower & foliage dies
MFT fishtail banner dies
Sentiment stamps
Cosmic Shimmer Aurora flakes 'lagoon'
Sizzix bio glitter - 663873 'purple dusk'  & 663870 'caramel toffee'
Papermania vellum
Gems
Hunkydory A4 acetate

Thank you all for stopping by once again.  I must admit this cooler heat much better for me, catching up on sleep now, all i did yesterday was snooze😀  I hope you all have a good week.  Hugs Emmax


Id love to enter the following:

***


Thursday, 22 July 2021

Fabulous friend

Good Morning everyone

In my stash busting this year i decided to use some double sided adhesive sheets ive had for eons.  I used them with sizzix biodegradable glitter - which im very impressed with.  I don't 'do' glitter normally but this doesn't seem to go everywhere like synthetic and unlike other biodegradable ones ive tried it is really shimmery which sadly the photos don't pick up. 


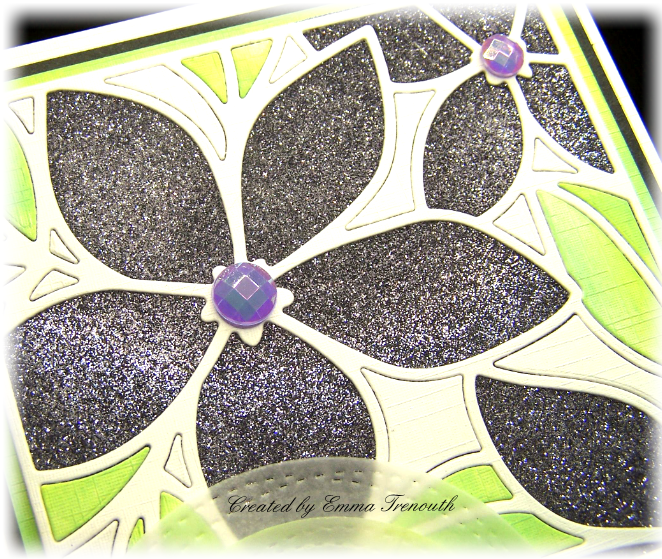
I first attached one side of the sticky sheet to cardstock, then die cut the floral panel from white card and attached to the other side of the double sided sticky sheet.  I then paper pieced back in the white background pieces and coloured the leaves with oxide inks before also piecing back into place.  I then added the black glitter to the flowers, burnishing it well.  I then mounted onto card inked with the oxide inks i used for the leaves, black card and then the white base card.
I stamped the sentiment and die cut into a fishtail banner, 2 vellum die cut circles, i inked the smaller one with the green oxide inks.  Die cut butterfly to finish.  Lilac gems used to the flower centres to finish.
I made a portrait and landscape version.


and a portrait version

Whats more summery than flowers and butterflies - the butterflies have certainly been enjoying all this sunshine this week


Close up trying to show the shimmer of the glitter.


Items Used:
Pink fresh ornate floral die
Sizzix butterfly dies
Wonky stitched circle dies
MFT fishtail banner die
Sizzix biodegradable glitter - 663871 cobblestone
Distress oxide inks twisted citron, cracked pistachio, lemonade, shaded lilac

Thank you all for stopping by once again.  I hope you are keeping cool.  One thing the heat seems to have brought my mojo back😁    Hugs Emmaxxx


Id love to enter the following:

***


Monday, 26 April 2021

Kraft Poppies

Good Morning everyone

This kraft card had beautiful printed poppies on it so i decided to colour them in.  It was an old paper pad from B&M called vintage baroque


Card approx 6.5x6.5"..  I coloured the poppies with Derwent inktense pencils and used a grey alcohol marker for the background.  I die cut with my spellbinders grand labels 1.  I then used a smaller scalloped labels 1 and die cut 2 panels from the middle of this piece.  I die cut a larger fancy labels 1, and then attached the outside of my poppy panel with foam tape, then the middle size i added back in glued flat and the very middle piece i added on foam tape again, making sure the pattern lines up each time  - i did this just to add some interest to my poppy panel.   I stamped the sentiment on a smaller kraft square and added with foam tape to the middle. 

Butterflies die cut from kraft card with a gem centre to finish. I then die cut the largest grand label1 from kraft card, folded this is half to act as my cardbase and then attached  the poppy panel.

Showing it side on and how it stands up.  You can also make out my layers in the poppies better here.


Items Used:
Kraft paper pad - B&M 'vintage baroque'
Kraft card
Spellbinders grand labels1, scalloped labels 1
Circle die
MFT birthday circle die
Sizzix butterfly dies
Clearly besotted sentiment stamp
Derwent inktense pencils
Kuratake wink of stella pens

Thank you all for stopping by once again.  I hope you are all holding in there. Hugs Emmaxx


Id love to enter the following:


***


Monday, 23 November 2020

Friends of a feather

Good Morning everyone

My 2nd card with those fab carabelle bird stamps is for a friendship swap i joined in. 

Card size approx 7x5"  Using Crealies XL stitched arch dies i made my base card from white card and a frame from white and black card.  I die cut a piece of paper for my background and attached them all to the base card.  The birds were stamped, simply watercoloured with distress inks....ive been previously asked why i always say i 'simply' coloured an image and thats as I usually only just add colour without spending time doing serious shading with light and dark....i have no patience when it comes to colouring in and don't find it at all relaxing😁

I then Cut out the birds and then i spent quite a while building up the scene with them.  In my last post i mentioned that this bird stamp is 11inches long so ive just cut them into small pieces.

Sun die cut from yellow paper, stamped sentiment and touches of glitter glue to finish.

A close up - i added glossy accents to their eyes.

Items Used:
Carabelle studios stamp - 'des oiseaux sur un fil'
Clearly besotted sentiment stamp
Crealies XL arch dies
MFT sun die
Distress inks
Patterned paper
White & black card
Ranger glossy accents & diamond stickles

Thank you all for stopping by once again.  I hope its a good week for you. Keep Calm and Carry on Crafting is my Motto at the moment!   Stay safe. Hugs Emmaxx


Id love to enter the following:


Thursday, 8 December 2016

Friend Shaker Card

Good Morning everyone on this wet and grey day.  

So today im sharing another shaker card, been into these this year.  I made this for a special friend for her birthday.  


I used Spellbinders 'fancy label tags one' die set, first to cut out the aperture shape, i then cut another one in black which i set back in and backed it all with acetate.  Filled the shaker up with purple micro beads and some glitter.  Mounted onto purple card.  I then stamped the justrite 'friend' stamp onto the smallest tag cut from the set.  Ready made lilac and white roses and leaves to finish. 

Thank you for looking and all the amazing comments you have taken the time to leave.  I hope you all have a good day. Emma