Followers

Showing posts with label Sizzix Flip Its die. Show all posts

Monday, 19 December 2022

Sophie & Lizzy's birthdays

Good Morning everyone.

Today im sharing birthday cards i made for my nieces, Sophie was 11 on friday and Lizzy was 9 on monday, as always Ive made 2 cards, one from myself and one for my parents to give.

A4 Tri-fold stepper card made for Sophie.  She loves her fashion and I found a lovely girly paper in my stash that was perfect, i picked up on the tones in the paper and matted with a copper satin card which really dances when the light hits it.  I used 2 very old KennyK toppers from hobby house and cut the girls out.  I mounted one onto a white die cut oval and then the front panel and the 2nd girl onto the back panel. 

I die cut Sophie's name and age from the copper satin card & adhered to the panels, i drew around the alphas once glued down with a dark brown fine liner pen to help them stand out a bit better.  Computer printed sentiment in brown ink added to the middle panel.  As Sophie loves her bling i added large coffee colour pearls to the top right and bottom left corners to finish.

Showing it side on.

I used a tattered lace shutter die set which comes with all the mat layer dies too so great for a pretty quick card.  The paper came from an old make&create pad from the works

***

Card 2 for Sophie is again using an old tattered lace die set, it makes super tiny diamond fold cards so i lined up the die a 2nd time to make it a double diamond pop out - finished size approx 5x5"  Very old bobunny papers 'Isabella' in grey and pink so i used a pearl grey cardstock for my base.  Butterflies are an old spellbinders dies cut from dark pink card for their base and one of the plainer papers from the pad.  

I die cut the sentiment and Sophie from dark pink and silver mirri cards and did a drop shadow with the pink to help them stand out and added to the side panels.  Gems added to the butterflies to finish.

and showing the back of the card, i used paler papers on the side panels so could write the greeting.  Computer printed sentiments die cut into circles for the middle sections.


***


Lizzy's cards
More old stash in use - old presscut stepper die for the base cut from white card and then i found a paper to match the topper and added the panels.  The topper is another old one from hobbyhouse - they come pre-coloured.  I cut it to size, rounded the corners and added with foam tape.  
Sentiment and alpha's die cut from purple mirri card, lilac gems and glitter glue highlights added to finish.


Yep -you've guess it, another very old die set! Its good to dig out old dies again.  A Sizzix flip it set.  I die cut the base from white card and the panels from a fab pink & teal paper that came a few years ago from B&M.  I computer printed the sentiments onto white card and die cut into circles and added to the flip section.   Die cut spellbinders fairy dies from teal glitter card and gave them vellum wings, these i added to the base, 2 to the front and one on the back.  Die cut butterflies from gold holographic card to finish. 

Showing the front opened up

and the back of the card, i left a space on the left to write the greeting.

I hope you all have a good week, the countdown is on now, as crafters we plan for Christmas for months but it still seems to arrive quickly.  Big hugs. Emmaxxx


Monday, 3 August 2020

Alice is 5


Good Morning everyone, i hope you enjoyed the weekend.

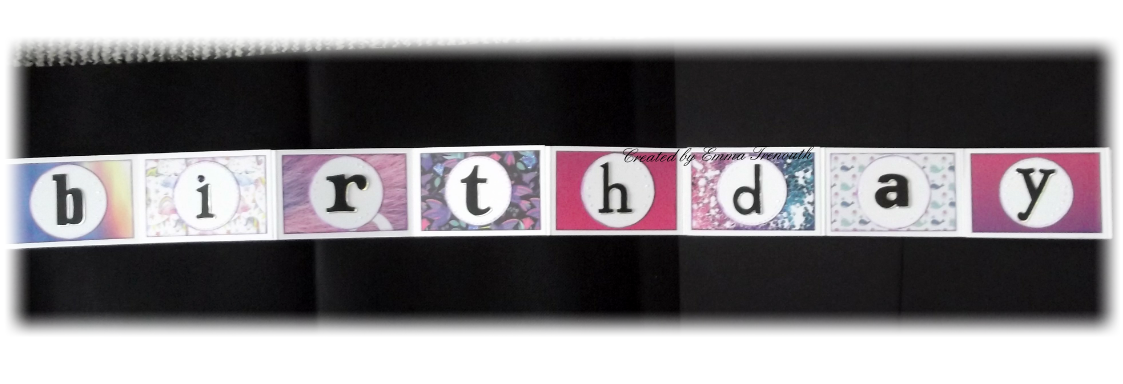
My middle niece Alice is 5 today - scary.  Anyway ive made a giant concentina style card for her, it came about as i had lots of offcuts from making a batch of tri fold cards which seemed a shame to bin so i glued them together in one long strip.  Alice loves school and learning so im sure she will love reading the message.  I used lots of off cuts of various papers on each panel - many of them with unicorns which she loves.  Lots of photos ahead....


This is the box i made for it, i added the knob on the top so that its easy for little hands to open the box.


I also added the little ribbon tab so its easy to pull out of the box

Starting to pull it out - each panel is approx 10x6.5cm in size

Pulling it out further

and showing the message 'Happy'  I added a silver holographic drop shadow to each letter so the light dances off them - i used a bigz die for all the letters

birthday

Alice

In between each word i added a panel with a little silver holographic butterfly.  It was very difficult to take photos as its so long - i had to do it on the floor in the end but hopefully you get the gist of it😁  I did also add papers to the backs of each panel so i think she will also enjoy that as lots of them have magical theme with unicorns, mermaids, fairies etc

***

and onto the card i made for my parents for Alice - a very simple one using a sizzix flip it die.


I die cut the base from lilac cardstock and the matting layers from the fab fairy paper.  Alice fav colour has always been purple so this paper was ideal (B&M magical beasts) I inked all the edges with purple ink.  I computer printed the sentiments and die cut into circles to fit.  I die cut the fairy once from white card and again from silver glitter card - i taped all the pieces in on the silver one so that stayed solid and shows through the front white fairy. Glitter glue highlights to finish.

Showing it stood up with the flip panel

One side says Happy 5th Birthday and the other side Alice

And the back of the card, i used a soft paper so that the message can easily be written.

Items Used:
B&M Papers - magical beasts, ombre
Tim holtz bigz die - word play
Spellbinders circle dies
Sizzix butterfly die
Sizzix flip it die set
Spellbinders fairy die

Thank you all for stopping by once again - i do appreciate it.  I hope you have a good week.  I can finally venture out so having a hair cut tomorrow at last - only at my mums so won't be going too mad but can't wait for the hairdresser to work her magic on it after so long😁   Stay safe. Emmax


Id love to enter my first card into the following:


***

***

***

***

***


Monday, 11 December 2017

Sophie & Lizzy's birthdays


Good Morning all and welcome to a new week.  I hope you didn't get too much snow at the weekend, we had it very wet and windy down here.  

Today i am sharing the cards i made for my 2 nieces birthdays, Sophie had hers at the weekend and its Lizzy's tomorrow.  They are growing up so fast now. 

I had hoped to make them penny slider cards but ran out of time so dug out my sizzix flip it die sets, so quick cards but think the girls will love flipping them. 


Showing it closed up.  Red pearl card for the base, floral paper, computer printed sentiment die cut to fit the flip circle.  


Flipped Open which shows the otherside of the circle where i added the girls ages.  I picked up on the yellow in the paper and made some flowers, blue leaves and a pearl to finish.  I added glitter glue highlights as Sophie loves glitter.


Just showing the back of the card, i used a less patterned paper from the pad so can easily be written on.

and onto Lizzy's

Russet brown cardbase.  She loves owls and her bedroom is owl themed so found this fab paper.  I found this lovely chipboard owl in my stash too which i coloured with green paint to match the paper. 

Showing it flipped open


and again the back of the card using a less patterned paper from the pad. 

***

and then i made them up a simple house mouse card, i found these images id printed off a long time ago for the house mouse joanna sheen CD-rom

5x5 white cardblank.  I first decoupaged the image and added glossy accents to the bubbles.  Matted onto pink glitter card.  I then matted bubble pattern paper onto more pink glitter card and added to the card front.  Die cut sentiment. 

Same as before, using this lovely dandelion image, and gold mirri card.  I added frosted lace glitter glue to the dandelion seeds. 

Items used:
Echo Park 'Simple Life' papers (floral)
Carta Bella 'A perfect autumn' papers (Owl)
Joanna Sheen House Mouse Triple CD-Rom
Sizzix 'Circle Flip-it' 559171

Thank you for stopping by and all your comments and visits last week.  I hope you all have a good week and keep warm. Hugs Emma