Followers

Showing posts with label tim holtz crazy birds. Show all posts

Monday, 24 April 2023

In the birds nest

Good Morning everyone

This is one of those projects that turned out nothing like what i had in my head😀 

 I don't use much double sided tape, but i do use red liner for my envelopes and have been keeping the plastic rings that come in the middle, as thought i could use them instead of adding to landfill as our council won't take them for recycling......so a birds nest seemed a good starting point.....then these rainbow birdies turned out to be real magpies adding everything in sight into their nest😂


Canvas size 6x6".   See below for step by step of my background and nest building.  Once that was finished I stamped and coloured tim holtz crazy bird stamps and cut them out. 

I found a nice dry twig which i cut in half and adhered either side of the nest to give the effect of it being on a tree branch and surrounded with paper flowers picking up on the colour of the birds rather than true spring blossom colours.  

Creative expressions chat stickers which i backed with black card and covered with glossy accents 'Be real not perfect' 'choose happy' 'be unique' & 'dream'

To finish I edges the canvas with black which frames the scene nicely.


To adhere the plastic ring to the canvas i first glued it with glue gel and once that was dry, I tore old tissue paper into small pieces and used mod podge to adhered it, adding plenty over the top and sides of the hoop, i added 3 layers so that i had a good surface for my mediums to stick too rather than the plastic (pics 1&2).

I then took texture paste and smoothed it over the ring with a palette knife, I put some slight grooves in it to give it a look more like twigs (pic3)  I then used the texture paste through a splat stencil on the rest of the canvas (pic 4)  

Once the texture paste was completely dry I dabbed on acrylic paint in the same colours I used to colour my birdies - yes at this stage it looks a right mess (pic 5)

I then dry brushed on white gesso on the canvas and back gesso on the nest area.  This softens the 'mess' but you do still get the colours coming through (pic 6)  Doing layers like this really does make a difference to the finished artwork, rather than just having flat colour.  

I then dry brushed white gesso over the nest to soften the black (pic 7)

I filled the nest with reindeer moss & twine and then feathers in the same colour as my birds.

Then i dry brushed cadence dora paint in 'diamond' & 'gold' over the top to give a lovely shimmer to the finish when the light catches it - these paints give a similar effect as gilding waxes but i personally find them easier to use and of course being an acrylic paint they are far more versatile than some waxes..

Now this was my finished nest for my eggs but once I added the birds It just wasn't working and after days and days of thinking & looking and adding more and more it ended up like the finished result - very eclectic😁

and how i made my bird eggs.  A pack of foam eggs from poundland to start with, so that they were easier to handle i stuck them onto cocktail sticks which i could stand upright in a piece of polystyrene... I first coated them with white gesso, then mixed up the shade of pale blue i wanted in acrylic paint and gave them 2 coats, once dry splattered with brown and blue paint to give the speckled effect............for a first attempt at anything like this I was very pleased with the outcome....as the bag of foam eggs was quite large I will have to make some more in the future.

This just shows the plastic centres from the red liner tape, they are different depths, for my birds nest i used the deepest one of 8mm


Items Used:
Tim Holtz crazy bird stamps
Woodware mini splat stencil
Golden texture paste
Candence Dora paints 'diamond' 'rich gold'
Derwent inktense pencils
Black & White gesso
Pebeo acrylic paints
Creative expressions wordies sheets 'CEW003'

At the bottom of this post is some bead suncatcher ive also made using the plastic hoops if you fancy a peek.   Thank you all for stopping by, I hope my eclectic birdies have brightened your day with a smile and wishing you all a great week.  Big Hugs Emmaxx


Id love to enter the following:


***
https://art-journal-journey.blogspot.com/2023/04/recycle-reuse-repurpose.html - i have repurposed the doublesided tape ring  & used tissue paper from a shoe box in the background

***

***
***


***


I also thought they would make great bases for some wire & bead suncatcher, i used the 4mm plastic inserts for these
This first one is a little garden scene with yellow, orange and red flowers, a little dragonfly is flying by too.  Approx 3" (8cm) in diameter 
I first wrapped them with 1mm craft wire, this one in 2 shades of green.  I often use metal base hoops for my suncatcher so the bonus of these plastic ones is they are so light to start with, so i definitely be keeping them all from now on.  Great to keep them out of landfill and make something pretty with them.  
 

Version 2 is the sun,using gold and orange wire and beads with a large crystal prism in the centre to give off rainbows when the direct sun hits it.


and version 3 is very blue, I found this butterfly broach in the charity shop and its the ideal centre, it is full of crystals that really shimmer in the light, i then used blue wire and beads to give the effect of a blue summer sky the butterfly is flying through. 

Monday, 11 May 2020

Birds on a Wire

Good Morning everyone

Today im sharing a little mixed media project. For the background i added lots of die cut feathers - a great way to use up any colour scrap card as you white gesso over it all, it then gives you a faux stencilled texture paste look.


Approx size 12x6".     I cut a piece of white card to fit my frame, after die cutting lots of feathers from scraps of cardstock i glued them to the background - i then stencilled some stars with texture paste.  Once dry i covered it all with a layer of white gesso. I then sprinkled on turquoise brushos and silver pixie powders and sprized with water.  I added a little extra around my feathers so its a bit darker to add some depth. The gesso absorbs the some of the brusho's to give a softer look which i wanted in this case. 

I stamped my crazy birds and coloured with inktense pencils and fussy cut them out. I worked out where i wanted my birds and created my wire with waxed cotton twine, to keep it really taut i stapled it to the frame.  I gently curved my birds and added with glue gel. 

I picked out some tim holtz chit chat stickers, attached to black card, covered with glossy accents to add an enamel finish and attached.  It says:
'Attitude is everything'
'We are fearless, independant and original'
Which i thought was apt for the birds but also to inspire the viewer.


A close up, hopefully you can just make out the feathers and stars in the background.


I also added glossy accents to their eyes


The frame i used is a cheap one from poundland, its comes without glass but i thought ideal for these little works of art.  So to protect the picture i gave it a spray varnish.
.

Items Used:
Tim Holtz Crazy birds (original size)
Tim Holtz chit chat stickers
Derwent Inktense pencils
Brushos
Pixie powders
Joy crafts feather dies
Star stencil
Golden texture paste

Thank you for stopping by once again and all the comments you take the time to leave.  I hope you are all doing ok.  The weeks merge into each other these days, im still fighting the infection in my jaw as the operation was understandably cancelled so lots more antibiotics.  I hope its a good week for you.  Stay safe. Hugs Emmax


Id love to enter the following:

https://creativeartistemixedmedia.blogspot.com/2020/05/welcome-to-creative-artiste-challenge-60.html

*****
https://abitmoretimetocraftextra.blogspot.com/2020/05/abmttc-extra-challenge-may-anything-goes.html

*****

https://abitmoretimetocraft.blogspot.com/2020/05/a-bit-more-time-to-craft-challenge-115.html

*****
http://allsortschallenge.blogspot.com/2020/05/weeks-5712.html

*****
https://sweetstamperschallenge.blogspot.com/2020/05/44-animalsbirds.html

Thursday, 23 January 2020

Happy Bird-day

Good Morning everyone, i hope you're having a good week.

Today im sharing a fun card using those crazy birds and a good old favourite design of mine with the fishtail banners - my regular followers will know how well used these dies have been since i bought them many years ago, so much so that the coating is coming off in places and rust appearing😀.... they are just so useful


5x7" cardblank, bottom corners rounded.  I first stamped the crazy bird and water coloured with oxide inks, i then fussy cut him out.  I inked some white card using the same oxide inks and some mirror card with green alcohol inks, i then cut out lots of fishtail banners from them and mixed papers, i arranged these on my base card - takes a fair bit of shuffling to get an order that i liked. 
I then cut a circle from my green inked mirror card and 2 papers , i added my bird to the centre with glue gel for dimension.
sentiment die cut from scraps of the same papers, all the papers are from the same paper pad and some were little scraps, ideal for the tiny little fishtail banner. 


A close up on my owl, id added glossy accents for his eyes and you can see my green inked mirror card clearer.  The sentiment die is from a sizzix set - tropicool slider set

Items Used:
Tim Holtz crazy bird stamps
Oxide inks - squeeshed lemonade twisted citron, wilted violet & chipped shapphire
Alcohol inks - green shades
Spellbinders circle dies - plained & inverted scallop
Sizzix sentiment die - tropicool slider set 662783
MFT fishtail banner dies
Mirror card
Kaisercraft paper pad 'botanica'

Thank you all for stopping by once again. I hope you all have a good end of the week and weekend. Emma


Id love to enter the following challenges:


*****


*****


*****

*****

http://ttcrd.blogspot.com/2020/01/anything-goes-challenge-tuesday-21st.html


Monday, 25 November 2019

The Bird House


Good Morning everyone.  I hope you had a good weekend.

Today im sharing a card i made for my dads birthday with those fun crazy birds, i've teamed them with a stepper card and window die to create a bird house idea.


I first die cut my stepper card from black pearl cardstock and folded along the score lines. I then layered on some woodgrain patterned paper.  I took the middle panel of wood paper and die cut the window die into it, i then added acetate behind the aperture.  I added a stripey 'wallpaper' behind the window and attached to the cardbase.  I then die cut the window again from the black pearl cardstock and inlaid that over the acetate. 

I then stamped the birds onto white card and simply watercoloured with distress oxide inks, i picked colours to go with the stripey wallpaper. I then fussy cut out the two birds. I die cut various leaves from left over scraps of patterned paper and inked card.  I arrange the leaves and birds onto the bottom of the stepper.  

Just a close up on the birds.  I used oxide inks in candied apple, fozilised amber, lucky clover & salty ocean.  I added glossy accents to their eyes. 


Just showing the stepper card side on.  

Items Used:
Tim Holtz crazy bird stamps (original size)
Presscut centre stepper card die
Spellbinders window die
Various foliage dies
Bobunny paperpad 'broadwalk'
Black pearl card - payper box

Thank you all for popping by once again.  I hope by bright colourful birds brighten up the day. Emmax

Id love to enter the following:


*****


*****

https://watercoolerchallenges.blogspot.com/2019/11/wwc248-kaths-masculine-anything-goes.html

*****


*****


Tuesday, 3 July 2018

Blue & Brown - crazy birds

Good Morning all, i hope you are all enjoying the weather.

So its time for a new challenge over at cardz4guyz,   the theme this fortnight is

BLUE & BROWN


Ive made quite a simple card, and paper pieced my stamped crazy bird.  Paper piecing has always been one of my fav techniques as im not really into colouring in.   I used papers from a 6x6 paper pad that isn't necessarily male orientated in design. 


6x6 white cardblank.  I added a thin strip of blue dotty paper to the top and bottom of a panel of woodpanel paper and added to the cardfront.

I then stamped the bird in black so that i had the hair and feet on the wood paper.  I stamped the bird again on blue dotty paper and cut him out minus his feet and hair.  I gently shaped the body and added to the card front with glue gel lining up with the feet.  I stamped a 3rd time on white card cut out the eyes, beak & wing, and added this again onto the bird.  I added a touch of yellow pen to the beak, wing & tail. 

Stamped sentiment die cut into a speech bubble.  Then i added a strip of blue ruler paper for the bird to stand on.  


Close up of the bird, i added white gel pen highlights to his feet and hair and glossy accents to his eyes. 


Items Used:
My Minds Eye paper pad 'remarkable' by Jen allyson
Tim Holtz Crazy bird stamps - original size
Clearly besotted sentiment stamp
Wild Honey distress marker pen
Glossy accents

So do pop over to cardz4guyz  join in and see what everyone comes up with for blue and brown.

Thank you for all your visits and comments.  Keep cool. Emma

Monday, 12 February 2018

Cat & Bird Card Box Sets

Good Morning all, i hope you had a good weekend.

Today im sharing 2 box sets ive made as gifts.  

The first one is using 2 different cats stamps from Zinski art and the second set is using the Crazy bird stamps.


I decorated the lid of my box with the cat stamps.

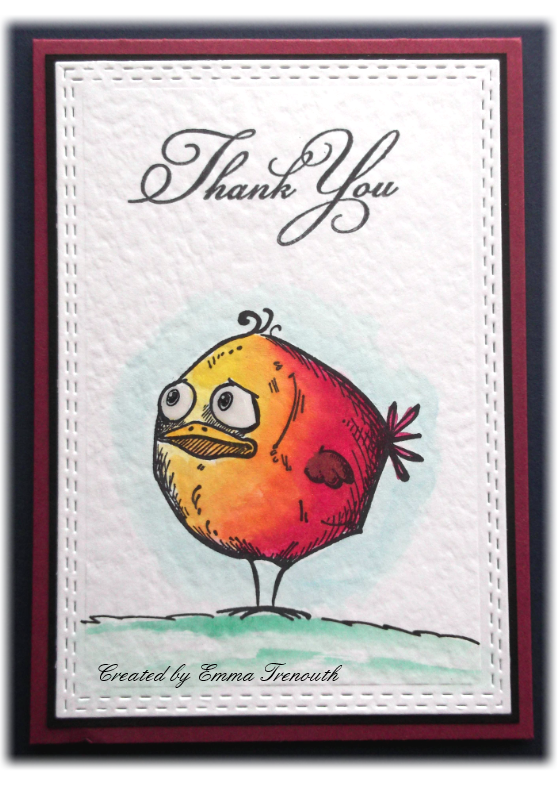
I first stamped the cat, doodled in a ground and coloured with wink of stella pens.  I lightly watercoloured blue background and green to the grass.  Die cut into a doublestitched rectangle.  Stamped greeting. Then matted onto black card and coloured card to match the topper colour.  

Im on a mission this year to use up some of the hundreds of coloured card ive amassed over the years!  

As above, the 2nd zinski art cat  stamp, again coloured the same way and matted onto purple card to match the wink of stella pens.


And below shows all cards i made for the set


This shows all 8 of the A6 (4x6) cards i made for the set.  The sentiment stamps came free with a magazine, but i like how they are all different fonts.  This set is for a friend who has a couple of cats and no birthday cards in the set as she always asks me separately to make those. 


and below on to the birdie set


Basically the same as the cat set just using the Tim Holtz crazy birds, as their is 6 different birds and i made 8 cards i used a couple of the birds twice.  This set does have a couple of birthday cards in it. 

Again i coloured them with wink of stella pens, shame the photos don't pick up the amazing sparkle they have. 


I kept the cards completely flat for ease of posting. 

Items used
Paperartsy Zinski art Mini stamps
Tim Holtz crazy bird stamps
Sentiment stamps
Wink of stella pens
Distress inks tumbled glass, cracked pistachio & lucky clover
Double stitched rectangle dies
Coloured card by payper box
Glossy accents

Thank you for stopping by and all your comments last week, also thank you to all of you that are following me by email.  If you are off for half term this week i hope you enjoy it, i shall be spending time with my lovely nieces.  Enjoy your week. Emma