Followers

Showing posts with label Make My Monday challenge. Show all posts

Monday, 21 January 2019

Winter Birthday

Good Morning everyone, i hope you had a lovely weekend.

Its time for a new challenge over at Make My Monday, the theme for the next 2 weeks is

WINTER BIRTHDAY

Funnily although most of my family's birthdays are in December and January ive never actually made a winter themed birthday card and found it harder than i expected.  I eventually decided on my snowdrop stamp set as the snowdrops are just coming out to flower in my garden. 


5x7 white linen cardblank.  I first stamped the snowdrops in black archival ink.  I then dry embossed 2 sizes of stitched rectangle dies to give frames.  One around the outside of the cardblank to frame it and one where i wanted the sentiment to be.  I think this is also my first totally flat one layer card too. 

I added masking gum to the snowdrops.  I then used a circlur leaf stencil centreed in the middle of the card and inked through with 2 distress inks, where the 2 green met they created a 3rd shade.  Evergreen bough & twisted citron.  Once ink was completely dry i removed the masking gum to reveal the white snowdrops underneath.

I then stamped my sentiment into the smaller embossed box.  I very lightly inked the outside card edge with evergreen bough DI and lightly embossed some small circles in the corners to add interest.  I think it will be the year of the stencil in my crafting😀, the more i use them and get the hang of the stencil brushes the more i like the effect, i guess like everything you learn each time.


A close up of the embossed stitched frame die and sentiment.  You can emboss any thin metal die by using a rubber mat. 


Close up of the snowdrops.  I left them completely uncoloured but added some clear glitter to the flower heads to help them stand out against the busy background.  I also went around them with a very pale grey alcohol marker.

Items Used:
Chocolate Baroque 'Spring is in the air' stamp set
Dots stencil
Leafy burst stencil
Double Stitched rectangle dies
TH Distress Ink - evergreen bough & twisted citron
Stickles twinkle glitter glue
CraftUk white linen card

If you fancy joining in or some inspiration for winter birthday cards please do hop over to MMM - im looking forward to see what everyone comes up with.

I hope you all have a good week and get some crafting in.  Thank you for stopping by and all your amazing comments last week. Hugs Emmax

Monday, 7 January 2019

Using Words

Good Morning everyone. 

Time for the first challenge of the year over at Make My Monday

The theme for the next fortnight is
WORDS
Use Words or a Sentiment 

After digging through my stash i found a fabulous sentiment stamp by justrite it says -
May a Rainbow run beside you in a sky that's always blue. And may Happiness fill your heart each day your whole life through.


7x7 scalloped card base.  I first stamped the sentiment onto a yellow patterned paper.  Into a piece of white card i die cut a inverted scalloped circle and kept the 'negative' piece, this i coloured with wink of stella pens in rainbow colours.  I then cut another piece of white card with a circle die to give a bigger aperture window.  This panel i embossed with a flower EF.  

All these layers i mounted up with foam tape to sit over each other.  Mounted onto white card and then rainbow mirror card and added to the cardbase. I added yellow wink of stella pen to the middle of the flowers on the embossed panel.  I then added all the ready made flowers and leaves. 

Red gems following the curve of the circle in the top left corner to finish.  This is a very bulky card but its also for a special person so they are worth it😊


A close up. I also added a small circle frame of white card to the wink of stella layer to help draw the eye into the sentiment. 

Items Used:
Justrite Stamps - wishing you rainbows CR-02118
Spellbinders Mbossibilites embossing folder - EL-005
Spellbinder plain circle dies
Spellbinders inverted circle dies
Rainbow holographic silver card
Wink of Stella Pens
Ready made paper flowers
7x7 scalloped card & white card - CraftUK ltd


Please do hop over to MMM to join in and see what everyone else comes up with using Words.

Thank you all for stopping by, i hope you all have a good week. Im starting my annual craft stash sort out, it always seems to get in such a mess with Christmas crafting.  Hugs Emmax

Monday, 10 December 2018

CAS Christmas

Good Morning all, i hope you had a good weekend.

Time for the last challenge of the year over at Make My Monday

The theme for the next 2 weeks is

CAS CHRISTMAS
So Clean & Simple designs


A6 white card blank.  Ive gone with a completely flat one layer design, again making use of a die that cuts into the card so adds extra interest and depth.  I added a coloured insert to contrast with the ink i used. 

I first die cut the snowflake burst into the cardbase to the right side.  I then used purple wink of stella pens and the wet into wet technique around the snowflakes.  Once dry i added a white die cut angel.  A pale teal patterned paper as the insert to peak through the snowflakes, i used a strip of this paper on the front left edge with a strip of card coloured with the same wink of stella pens just to tie all the colours & design together. 

I found this tiny joy to the world sentiment stamp from Penny Black in my stash which was the perfect fit for the bottom right corner. 


A close up, you can see the teal inside peeking through, just about making out some of the sparkle.  The Echo Park Angel die is the perfect size for the middle of the memory box snowflake burst die.


2 tones of blue wink of stella pens, sadly the photos don't pick up the amazing sparkle they give.  And yellow insert


Showing the yellow shining through


orange/red version.


Close up, you can just see the sparkle.

Items Used:
Echo Park Angel die
Memory box snowflake burst die
Penny Black Joy sentiment stamp
Wink of Stella pens
Various patterned papers from stash

Do pop over to MMM to join in our last challenge of the year and to see all the other CAS Christmas card designs and entries.

I hope you all have a good week, i shall be getting the decorations up this week. Hugs Emmax 

Monday, 26 November 2018

Non Traditional Christmas Colours

Good Morning everyone.

Its time for a new challenge over at Make My Monday.  The theme for the next fortnight picked by Mia is:

NON TRADITIONAL COLOURS FOR CHRISTMAS

So not really a challenge for me as those of you following me over the years know any colour goes for me even at Christmas.  For this set of cards i have gone with a more traditional Christmas image though of the Angel. 


Purple and green version.  Full details are below. 


I first die cut black card using a spellbinders grand label 1 and folded it in half to create my base card.  I cut a smaller white size, cut in half and counted on the front and back of the base, i then added a strip of inked card the same as ive used on the topper panel.

For the topper panel i die cut a white scalloped label 1 die and then die cut into it with a Tim Holtz mixed media die.  I mounted over inked card using foam tape and then added to a black labels 1 die cut.  I then die cut the Angel in contrasting inked card - ideal for all those little snippets i have amassed over the year from my brusho/pixie powder backgrounds.  I also cut the Angel from black card and added to the back as a shadow to help her stand out on the card.  I gently shaped her and added to the front with glue gel.  I only added glue to her body so her wings are free. Stamped greeting.

I then added the topper panel to my base card and added some gems picking up on the base colours.  Finished size is approx 5x5"


View from the top, a easy design to make with any square shaped dies.  


Just a close up of the angel


Purple & Green version, here i used the memory box collage die for the background.


Red and blue/lilac version


Red & Glittery Purple version.  I am slowly making a dent in all the off cuts ive collected all year from my sheets using brushos, pixie powders, inks etc and here the Angel is small enough to use up the little bits (approx  2x2").  I also seem to be using alot of dies this Christmas that cut into the card rather than out.  They seem to be a good way to add interest and depth without lots of layers. 

Items Used:
Echo Park Angel die
Tim Holtz Mixed Media dies
Memory box collage die
Spellbinders Labels 1 and grand labels 1
Brushos, pixie powders & wink of stellas

So if you fancy joining in with us and make a Christmas card with unusual colours and to just see what colours the others come up with do hop over to MMM

Thank you for popping by, I hope you all have a good week. Hugs Emmax


Monday, 29 October 2018

Using Stencils

Good Morning

Well time for another new challenge over at Make My Monday  with the theme for the next fortnight being

USING STENCILS

So basically use any stencil on your project, for either background or focal point.  I dug out a lattice style stencil and my wink of stella pens and had fun. 


7x7 White cardblank.   For the background i embossed my stencil using my big shot, i put it through on the die embossing sandwich with a rubber mat, the rubber mat then pushed the card through the holes in the stencil.  I then added my wink of stellas pens over the top.   I found it easier to add some of the wink ink to my mat and picking up with a flat head brush and brushing over the card, blending where the colours meet. For a bit of interest i stamped on some tiny birds & butterflies. 

For the topper panel i used heat embossing. Using blending foam i added sticky embossing ink onto my stencil, i then put it ink face down onto a piece of white card and transferred the ink from the stencil onto the card.  I then added clear embossing powder and heated.  The embossing powder acted like a resist on the lines then making it easy to colour inside the lines.  As i wanted my squares to have different colours in each square i found this a better way than trying to add the inks direct through the stencil. I then added the same colour wink of stella pens as i used on the background.


I attached both panels to black card and then onto the card front. Stamped greeting die cut into circles.  Butterflies die cut from white and black card and layered together.  Gems to finish.  


Just a close up.  I also doodled stitching with a black fine pen around the edges of the squares.  White gel pen highlights. Sadly the photos down show the amazing sparkle the wink of stella pens give.  


And this little A6 card i made with another piece i had made with the same stencil and didn't use in the end.  This time i used the stencil in the traditional way, using tape, I stuck the stencil onto white card and then sponged ink through it using the same wink of stella pens.  Layered onto black card, stamped greeting, butterfly and glitter gems dots. 

Items Used:
Lattice Mylar Stencil
Wink Of Stella pens - red, orange, yellow, mint
Clearly besotted sentiments
Sizzix butterfly dies
Large stitched square dies
Wonky square dies
stitched circle dies

So if you fancy joining in and finding out what everyone else comes up with using their stencils please do hop over to MMM

Thank you for stopping by and all your recent visits and comments.  I hope you all have a good week as we head into November. Emmax


Monday, 15 October 2018

Number Games

Wow cant believe how fast October is going, time for another new challenge over at

With the theme for the next two weeks being:

NUMBER GAMES
Use One or More numbers


I decided to go with a Christmas card and dig out an old Tim Holtz Vintage Noel bigz die, but ive also used a number stencil in the background for a more subtle use of numbers. 


A5 White cardblank.  I first used texture paste to stencil my numbers onto a piece of card just smaller than the cardfront.  Once dry i used green, blue & purple imagination crafts starlight paint to build up a dark sky for my scene - sponging on a couple of light layers of paint works better to blend the colours than one thick layer.  When the light hits the paints and the texture paste it really shimmers.  I added the panel to my cardfront and then die cut a curved border from white card and added to the base as a snow bank for my characters. 

I stamped the characters with black archival ink on my usual craftUk white card and then coloured them with alcohol markers.  I added glossy accents to their eyes, touches of glitter glue and enamel drops to embellish them. I added them to the card front, i added a touch of shadow under them on the snow. 

 I then die cut the greeting and number 25 from white card, covered with white glitter and then added to the card front. 


Items Used:

Paperartsy Zinski Art stamps ZA19
Number stencil
Tim Holtz bigz die 'Vintage Noel'
Concord & Ninth season of cheer die
Stitched border die
Imagination crafts starlight paints - blue, green, orchid
Silver gilding wax
Alcohol pens. 


To join in, see the rest of the design teams makes and all the wonderful entries do hop over to MMM

I hope you all survived the awful weather at the weekend.  Rather wild and windy.  I hope you all have a good week. Emma

Saturday, 29 September 2018

Katzelkraft Animals

Good Morning all.  I hope you all had a good weekend.  

So once again its time for a new challenge over at Make My Monday and the theme is

ANIMALS

So one of my favourite themes and I dug out the katzelkraft farm animal stamps again, this is a brilliant set for me with my family and lots of friends being farmers or even just living in the countryside. 


I first stamped my pig stamp and masked him and then with more stamping and masking stamped a small flock of sheep behind the pig. I doodled in some ground and grass for them to all stand on and then very simply coloured with distress oxide inks and water.  I stamped the pig once more and after colouring i cut out his body and decoupaged onto the topper with glue gel.  I mounted onto black card and added a white die cut frame over the top with foam tape.

I then made a backing paper with the same oxide inks i used on the pig and water.  Once dry i cut to size, mounted onto black card and then the 6x6 white card blank. I added my topper at a angle and then some chit chat stickers saying ' Its good to be different'


Close up.  I added glossy accents to the the eyes.

Items Used:
Katzelkraft farm animals stamp set
Mama Elephant frame die
Distress Oxide inks - fossilized amber, pistachio, raspberry, candied apple, peacock feathers, salty ocean
Tim Holtz chit chat stickers

So if you fancy joining in or see what everyone else comes up with please do hop over to MMM

Thank you for stopping by.  Hope you have a good week.  Hopefully im now home after my holiday.  Emma


Monday, 17 September 2018

Autumn Colours

Good Morning all, its once again time for a new challenge over at 

Make My Monday   with the theme this fortnight being

COLOURS OF AUTUMN/ FALL

For my birthday i was given a copy of the creative stamping magazine, first time ive ever had it, it came with a beautiful set of autumnal stamps - right up my street so i didn't hang around to try them out, i made this card for a friends birthday that was last week. 

I dug out an old bobunny paper pad full of autumn papers.  I first decided which paper i wanted for the background, i wanted the 2 large flowers on it to be visable so used it on its side.  (the recipient was probably eagle eyed to notice the tiny script in the background on its side - something i only noticed after making the card!)  I mounted this paper onto dark maroon card and the white 6x6 cardblank. 

I stamped my squirrel 3 times, once onto white card and then onto 2 different papers, i die cut the white one into a stitched circle.  Then cut out all of the dark paper one and glued it onto the white one and then i cut the orange one and again added over the top with glue gel to give him some shape.

I stamped the sentiment onto white card and die cut into a circle, i then mounted both circles onto maroon and then the cardbase.  I then die cut lots of little leaves from papers and the maroon card and arranged them around my squirrel.  Enamel viva drops then added in co-ordinating colours. 


Close up of the squirrel.  After paper piecing him i added a little bit of grey pen for shadow and white gel pen to his eye and nose. 

Items Used:
Bobunny papers 'Autumn Song'
Creative Stamping magazine issue 60 stamps
Stitched & plain circle dies
Spellbinders 'little leaf' die set
Viva paper pens - orange, yellow & red

Please do pop over to MMM to see what everyone comes up with and join in with this fabulous theme.  

I hope you all have a good week. Emma


I would like to enter the following:


Monday, 3 September 2018

New York New York!

Good Morning everyone.

Its time for a new challenge over at Make My Monday and the theme this fortnight is:

NEW YORK NEW YORK!

This one really got my brain whirling, not really having any suitable stash or ideas i did some reading up online about New York and its History which was very interesting.  I decided to focus on that iconic image of the statue of liberty.  So went looking for free downloads of a silhouette of the statue.   On seeing this head only image it sparked an idea.  Ive gone for a very inky, stamped mixed media feel on this project. 


I first printed out the Statue of Liberty head onto white card, i then die cut into a large circle approx 7".  I went over the image with an embossing pen and added black embossing powder.  I did this so it stands out well, acts as a resist and the printer ink would be set for all the water i would be adding. 

I went with a blue, red & white combo.  I used a star stencil to add white embossed stars through the middle section.  I heat embossed some stamped rain drops.  I then added blue and red brusho's and let dry, i avoided the face to keep that white. 

I then added more stenciled stars with black distress ink, some stamping of various stamps in black, blue & red.  I then die cut my 'reach for the stars' from black and white card and off set for a shadow.  Once attached i covered them in glitter.  To finish i mounted onto a black circle card base. 


Just a close up.  
When pursuing our dreams and reaching for the stars we often have to have a few tears on the way and a few tears on finally reaching our goal! Its always good to have something to work towards even something little.  Thats my deep thinking for the week😀

Items Used:
Stampin up 'kinda eclectic' stamps
Star stencil
brushos
distress inks
Alphabet dies
Spellbinders grand circle dies
Statue image found here

So if you fancy joining in or just seeing what everyone comes up with for this challenge then please do hop over to MMM


*****

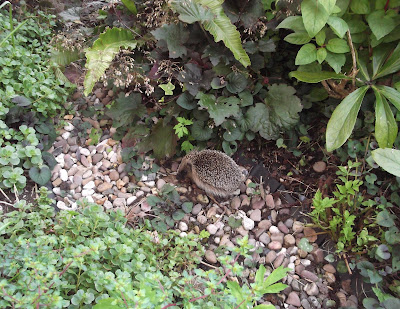
and 3 baby hedgehogs that came out in the daytime this week, so ive set up more feeding stations for them.  Im hoping they just got disturbed & decided to have a wonder around rather than them knowing its going to be a cold winter as usually don't see them in the daytime fattening up until oct/nov.  


I only have a small garden but try to keep it wildlife friendly - hence my little wood pile!!  

The farm animals are also fast piling on weight and a heavy thick coat - maybe another sign that nature knows we are in for a cold spell.  Hopefully not though. 

I hope you all have a good week whatever your plans.  Emma


Monday, 20 August 2018

Back To School


Good Morning everyone, i hope you had a good weekend.  

Its time for a new challenge over at Make My Monday

The Theme this fortnight is:

BACK TO SCHOOL


I Must admit this is the first ever back to school card ive made, my little niece Lizzy is starting school for the first time next month which is a bit scary - they are growing up fast.  Not really having much in my stash, i made it with my niece Sophie in mind, she loves arts and crafts and writing at school. 

In my graphics programme i designed a piece of lined paper and added the back to school and have fun sentiments with an old typewriter type font.  I then torn around the edges.  I added this to a black A5 cardbase.  

From scraps of brusho card i die cut some ink splats, from white card i die cut the pen, paint brush, scissors & ink bottle and coloured them with alcohol pens, black for the handles.  They are a sizzix sizzlet die set i was kindly given quite a while ago.  I arranged them around my ink splats with a bit of twine/string.  Enamel drops to finish. 


Close up, i used glossy accents on the bottle

Items Used:
Sizzix dies 'sewing & writing set' 657752
Ink splat dies
Viva paper pens
Alcohol markers
Glossy accents
Brusho's

So if you fancy joning in and just seeing what everyone comes up with for back to school, please do hop over to mmm

Well today my little nieces are coming down to spend the day with me so that will be fun and hectic im sure, they are growing up fast.  I hope you all have a good week.  Ive also added a page to my header bar of the beautiful birthday cards i got if you fancy a peek.  Emma

Monday, 6 August 2018

Oriental Tri-Panel card

Good Morning everyone, its monday again and time for a new challenge over at Make My Monday


The theme this time is 

ORIENTAL

So digging through my stash found this beautiful stamp which came free a while ago with a magazine and lovely paper pad called cherry blossom by kaisiercraft. 


I didn't want to hide the beautiful papers so decided to make a different shaped card.  Not sure what its called but image below shows it better.  I stamped my image onto white card and various papers so i could paper piece the image.  I then mounted the topper onto black cardstock. 

I picked out a lovely fan paper which i thought went with the image perfectly and layered onto black card and then the card base.  I used more papers and layered up and added across the middle of the card base. 

All the flowers came from the paperpad too, so i cut out lots of them and arranged around the lady and on the base.  Orangey gems to finish. 

Showing the shape of the card from above, i was inspired by a beautiful card i was sent, i took a sheet of A4 white card and scored it 4 times in the middle and folded.  You can easily change the size depending on the size of the topper etc.  I used a corner punch on the outside edges. 

Close up of the image.  I paper pieced her with plain papers from the pad, i added extra colour to the flowers with a alcohol pen.  Touches of glitter glue to the flower centres.

Items Used:
Stamps - Japanese Tea Garden freebie from Cardmaking & papercraft magazine
Kaisercraft paper pad 'cherry blossom'
Double stitched rectangle die set
Stickles diamond glitter glue

Thank you for stopping by and if you fancy seeing what everyone else comes up with for the Oriental theme and to join in please do hop over to mmmchallengeblog


I hope you all have a good week and can keep cool if effected by the on going hot weather.  Hugs Emma


Monday, 23 July 2018

Carabelle stamps

Good Morning everyone, i hope you enjoyed the weekend.

So its time for a new challenge over at Make My Monday  with the theme for the next fortnight being

COLOUR AN IMAGE
Stamped or Digi image

I also decided to combine this with a birthday card for my best mate who is a little quirky so i dug out my paperartsy stamps and had fun.  Now im not really into colouring in, for me its not relaxing more a means to a end.  So i dont really do alot of it.  Anyway i went over board on this one and dug out the alcohol markers, wink of stella pens & distress markers. 


I first stamped all my stamps with black archival ink, making a little scene for the quirky dog.  I doodled on some butterflies.  Then die cut into a stitched square.
 I then added light colour to the background with diluted distress markers.  I coloured the flowers with alcohol markers.  I coloured the dog, sun & butterflies with wink of stella pens.  I stamped a second dog to cut out and decoupage on top of the first.  

Mounted onto a black die cut square and a white 7x7" white cardblank. Glitter glue to finish.


Just a close up on the dog image, its a shame photo doesn't catch the sparkle of the wink of stella pens. 

Items Used:
Paperartsy Zinski Art stamps - ZA09 & ZN19
Carabelle stamps -  Zinouk du jardin
Stampin up stamps -  Work of Art
Wink of stella pens
Tim Holtz Distress markers
Promarker alcohol pens
Black fineline pen
Signo white gel pen
White card as always is craftUK
Diamond Stickles glitter glue


So if you fancy joining in or seeing what everyone else comes up with then please hop over to mmmchallenge  

Wishing you all a lovely week, thank you for stopping by as always.  I really do appreciate it.  Emmax


Monday, 9 July 2018

Fantasy - Fairy shaker card

Good Morning all, i hope you had a good weekend and are still enjoying the sunshine.  Well the cats and i are still competing over the fan😀,  

So its time for a new challenge over at Make My Monday  the theme this fortnight is:

FANTASY
fairies, dragons, elves, unicorns, mermaids etc


Ive gone with fairies dancing in a flower garden shaker stepper card.  Fantasy is a good theme, you can go cute and twee or dark and mystic so something for everyone.


I first die cut my stepper card from white linen card and folded along the score lines.  I then die cut the matting panels from backing paper id made with orange and green brushos & pixie powders.  

I then die cut the happy birthday twice, once from white card and then black card and offset them, i added a circle of acetate to the back.  As i only had a thin section to add the foam too i die cut 6 circle frames of card and glued together, i then glued that to the back of the happy birthday to create my shaker pocket, added my micro beads and glitter and added a circle of card orangey coloured with brushos to the back.  I then added this shaker element to the top of my card.

I then die cut my fairies from black card, i added vellum behind the wings which i lightly coloured with blue pen.  I die cut a second fairy and just cut out the body section and decoupaged on top of the base layer to add dimension.

I then die cut the floral swirl corner die from red and purple brusho/pixie powder card and arranged around the fairies so it looks like they are dancing among the flowers.  Yellow gems to finish. 


Just showing the card face on


Close up of the shaker, i put orange behind as a kind of 'sun' 


Items used:
Presscut stepper card die
MFT Birthday circle sentiment die
Spellbinders fairy dies - Ariana S2-102 & Cierra S2-103
Spellbinders de-lites - floral corner 2 die S2-151
Brusho powders
Cosmic shimmer pixie powders
Vellum
Micro beads

So if you fancy joining in or seeing what others come up with for fantasty please do hop over to mmmchallengeblog     

I hope you all have a good week and are keeping cool.  Hugs Emma


I wish to enter the following challenges


Monday, 25 June 2018

Ice Cream - hobby house image


Good Morning everyone.

Time for a new challenge over at Make My Monday, the theme this fortnight picked by me is very apt for the weather i think and is:

ICE CREAM
Use either ice cream images or just Ice cream colours


Think - mint chocolate chip, raspberry ripple, peach melba, banana split etc,

I went with Ice cream colours of Peach Melba, so peach and raspberry combo.  


6x6 white scalloped card blank. I found this lovely pre coloured hobby house image in my stash, the perfect colours of peach and raspberry.  I matted it onto a maroon fancy circle die cut. I matted a pink pattern paper onto maroon and onto the card base.  Then a panel of peach paper, again matted onto maroon and i added it over hanging the cardbase to add interest. 

Die cut sentiment from white and maroon, which i offset for a shadow and added on the topper, i added clear glitter to the sentiment and the topper, looks like a sugar frosting.  Ready made paper flowers, peach beads on wire to embellish. 


A close up of the floral arrangement. 

Items Used:
Kasiercraft paper pad 'cherry blossom'
Hobby House Topper
Ready made paper flowers
Beads on wires
Spellbinders large circle die


So please do hop over to Make my monday to join in and just see what everyone comes up with.   

I hope you all have a good week, looks like its going to be a hot one here. Emma