Followers

Showing posts with label paper scraps. Show all posts

Thursday, 24 September 2026

Christmas Stars

Good Morning everyone

Today im sharing a batch of cards that started out using very slim offcuts of Christmas/winter themed papers left over from previous years from making envelopes.  I had no idea where these would end up but first off i used the strips to make a 'new' paper by adhering them all to a piece of paper.


I raided my stash for old silver mirror & glitter card which was about time it was used, the silver going nicely with the blue tone papers.  


DL card white card base (approx 4x8")

I cut my stripe paper to size and put through a 3D embossing folder, this helped embed the stripes together as well as add a lovely tactile feel.  I then dry brushed over the top with vintage white chalk paint and a light touch over the top with white pearl cadence dora paint which gives a beautiful shimmer.  I matted this onto silver satin card and then the card front.

I cut the middle out the silver mat layer which i then used for my die cut elements - thus making it go further and no one would know as the hole is hidden behind the beautiful embossed panel.  

I die cut the circular sentiment from navy blue card, then cut a circular frame from white card using 2 circle dies, then a larger frame from the same silver card used for the mat layer.  You end up with a 'doughnut' so can see through the middle to the paper and embossing. 

I then die cut alot of stars from the various silvers, blue and white and adhered a different centre into the frames....very fiddly but worth it, i used a bit of tape behind the star to hold the solid centre into the frame.

I then adhered 3 under the sentiment as if hanging from circle, I used pinflair glue gel here so could get them at different levels etc..


Close up on the stars.
Navy solid star with silver satin frame
Silver solid star with silver glitter frame
Silver glitter solid with navy frame

Sadly the photos just don't show the beauty of the glitter, mirror and beautiful pearl stars😞  In real life they really shimmer and sparkle in the light.


Version 2 using silver mirror card for the mat layers


Version 3 uses silver glitter card for the mat layer


This shows my paper stripes adhered to A4 paper to make my 'new' paper.  When i did this i had no idea what i was going to make so on one i adhered the patterns horizontally and the other vertically.  The papers are all slightly different widths so i just stuck them on randomly, not over thinking it.

Left photo shows it just embossed and the right one shows it after i dry brushed the white and pearl paint over the stars, it just softens it all and helps bring the different patterns together.  Honestly in real life it is very shimmery

Items Used:
MFT Christmas sentiment circle die
Spellbinders Circle dies
Frantic stamper Star on a string die 
Lisa Horton Slimline 3d embossing folder 'Starry Night' LHCEF077
Various scraps of patterned papers
Jane Davenport gess-oh 'white' 
Cadence Dora paint 'white'


Id love to enter card #1 into the following:

**
**

**


Tuesday, 22 July 2025

Thank Moo tag

Good Morning everyone

Today I have a little tag I made for my brother which I added to some beer and chocolate to say thank you for running me to hospital and back

I had this cow stamped out from a previous project, she was stamped in navy ink onto cream, I added a little more colour by watercolouring with distress inks and then cut her out.  Yes she is a she as she looks like my dads old cow noddy with her tongue stuck out😁 and yes female cows can have horns, naturally they have horns so they can protect their young, although these days they are usually de-horned as calves which I think is why many think only the males (Bulls) have horns

In my scrap drawer I found a blue tone and soft green tone paper which I die cut with a smaller tag, i then tore the edges of the green paper to give a grass like effect and added to the bottom of the blue.  All edges inked with stormy sky distress ink.

I added the cow into place with pinflair glue gel.  The sentiment is a mix of 2 different stamps, one said happy birthday to moo, so i added tape over the part of the stamp I didn't want, inked up, removed the tape and stamped, so I got a clean crisp 'Moo' I then did the stamp with a Thank you stamp, masking the 'you' with tape, inking up, removing tape and stamping next to the 'moo'

I punched a hole and added some bakers twine to finish


On the back of the tag I added a pocket using a piece of the green paper used on the front, i cut it to size, inked the edges and then added glue to the bottom and two sides only, leaving the top adhesive free.  This allowed me to add a little fuel money in for my brother as well.  A gift card would also fit nicely in this little pocket.

Items Used:
Katzelkraft stamp SOLO180 'Portrait de Vache'
Sentiment stamps
Tag dies
Distress Inks - peacock feathers, stormy sky, dried marigold & wild honey
scraps of patterned paper
CraftUk ltd cream cardstock

Thank you all for popping by today. Start of the summer holidays now so will be getting some crafting in with my nieces hopefully. Emmax


Id love to enter the following:


**

**

**


Tuesday, 18 March 2025

WLS March#2 - Hello Spring

Good Morning everyone

Gosh where does time go to, half way through March so time for more inspiration over atWe Love Stamping where the theme is

SPRING 
or if thats not for you we always have the anything goes option as long as you use stamps - physical or digital

In the January Sales I got this lovely tulip collage effect stamp from Studio light which i thought would be ideal for my easter/spring cards this year.  Ive also raided the scrap draw and used alot of paper offcuts up - using thin strips left over from making envelopes for the backgrounds & smaller pieces to paper piece the flowers.

I made 15 variations - they are also totally flat which is very rare for me, so easy posting

DL (8x4") Kraft card base with rounded corners.  I stamped the image in black onto soft toned patterned paper and die cut with lacy DL nesting dies, I watercoloured the leaves, stems & bulb with inktense pencils, also adding a little grey shadow around the flowers to give a little extra depth. I stamped the flowers again onto different papers, cut out just the flower heads and paper pieced flat onto the base image. 

I die cut another piece of patterned paper with one of the lacy nesting dies - actually I only die cut the end sections, cut off and adhered to the card front - great way to use up small pieces of paper & add interest to my layout - the cut edges are hidden behind the topper panel. 

I stamped the love spring sentiment from clearly besotted stamps onto scrap of kraft card, cut to size and adhered to the front.  I added green stickles glitter glue to the centre of the smaller flowers for a little bling to finish.

 
and the inside - again i raided the scrap paper drawer - very satisfying to have used up so many off cuts and little snippets.  I die cut a pale paper with the same lacy DL nesting die used on the front, stamped another clearly besotted sentiment stamp in black and a chocolate baroque tulip stamp in grey.

Version 2 - Ive yet to see turquoise tulips but who knows one day! lol

The sentiment quote is lovely and so true
'The first blooms of spring always make my heart sing' 

It is a magical time of year when everything is awakening.  Had my first hedgehogs out of hibernation last week and another 2 joined them this week...well thats only the ones I have seen in the porch eating their dinners...well breakfast I guess as they come just on dusk.


Version 3 - sorry for the not great photos - had a nightmare taking the photos

and another version😀

Items Used:
Studio light stamp #394
Chocolate Baroque stamp (tulip) 'spring is in the air'
Clearly Besotted stamps (CBSSE208) 'Seasonal sentiment'
DL nesting dies
Various patterned papers
Derwent Inktense pencils
Ranger stickles 'lime'
CraftUK ltd kraft card

We have these beautiful pennyblack stamps as prizes this month so do hop over to We Love Stamping  to join in and see what the rest of the DT came up with.


Thank you all for stopping by once again and all your amazing comments which i always appreciate. Emmax


Id love to enter 1st card in the following:


Sunday, 14 July 2024

Hollyhocks

Good Morning everyone

Today is a summery DL card using one of my most used dies - these lovely hollyhocks from Impression Obsession 

 I die cut the hollyhocks from inked card scraps left over from making these cards


DL card (approx 4x8")   I inked the edges of the card with pink & yellow distress inks and that matted a white die cut on top.

I die cut lots of hollyhocks, these dies are great as can use the smallest strips of cardstock so ideal for left over snippets. The pieces that aren't big enough to cut the whole flower stem from are ideal to build up a bouquet by tucking in the top behind everything else.  I die cut foliage from green cardstock which again was scraps. Jar die cut from piece of blue paper in my bit box and a bow die cut from yellow inked cardstock.

I curved the jar and added with glue gel so that the top is unstuck for me to tuck the flowers and foliage into.  I then got building my  arrangement.  Sentiment stamped onto die cut tag to finish.

Just a close up, i had added shape to the hollyhocks with a ball tool and adhered the front ones with pinflair glue gel.  The photos don't pick it up but the pink is shimmery when the light hits it.

Hopefully we soon get some proper summer weather, although we have had a couple of nice days this week

Items Used:
IO hollyhock die
Foliage & Jar dies
Distress Inks - 'squeezed lemonade, riper persimmon, picked raspberry'
Dylusions simmer spray 'bubblegum pink'
Brusho powder 'yellow'
CraftUk ltd white linen card


Had this mummy hedgehog with 3 hoglets turn up this week, we have at least another 2 babies as well which is lovely....there is actually a food bowl under them😀    


  I hope you have a good week. Emma


Id love to enter the following:

https://pixiessnippetsplayground.blogspot.com/2024/07/challenge-484.html - My snippets were used for the hollyhocks and foliage


Sunday, 31 December 2023

Happy New Year

Good Evening everyone

I hope you all had a good Christmas, due to life and ill health I haven't been able to post for a while so im doing a mass upload of my Christmas cards so that I have a record of them.

Wishing you all a Happy and more importantly a Healthy New Year. 


Christmas Poinsettia's

Using up offcuts of acetate, i had some folded thin strips which i adhered between folded strips of white pearl cardstock - these were also offcuts from making card blanks.  Sentiment stamped with iced spruce distress ink using Lisa Horton stamps 'festive flurry sentiments'.  Tim holtz tattered poinsettia die used to cut more offcuts of acetate which were coloured with red alcohol inks. 

Version 2 - the holly was die cut from silver mirror card which was coloured with green alcohol inks  Cheerylynn holly die    Gold gems added for some bling.  I used lightly patterned papers for  my inserts which show through the acetate panels


***
Christmas patchwork

Using Lisa Horton 'Diagonal square background' 'LHCCD073'  I die cut lots of little offcuts & scraps from various Christmas papers, green pearl card, red satin card and gold mirror card and paper pieced them together.

Ideal for batch making and very therapeutic to make.

***

Nativity

Woodware 'rejoice' stamp set  I have stamped the image onto white vellum and coloured the back with alcohol markers.  Used DL nesting dies to make a frame and mounted onto a white card blank.  Touch of glitter glue added.

The same but different colourway

***
Winter berries

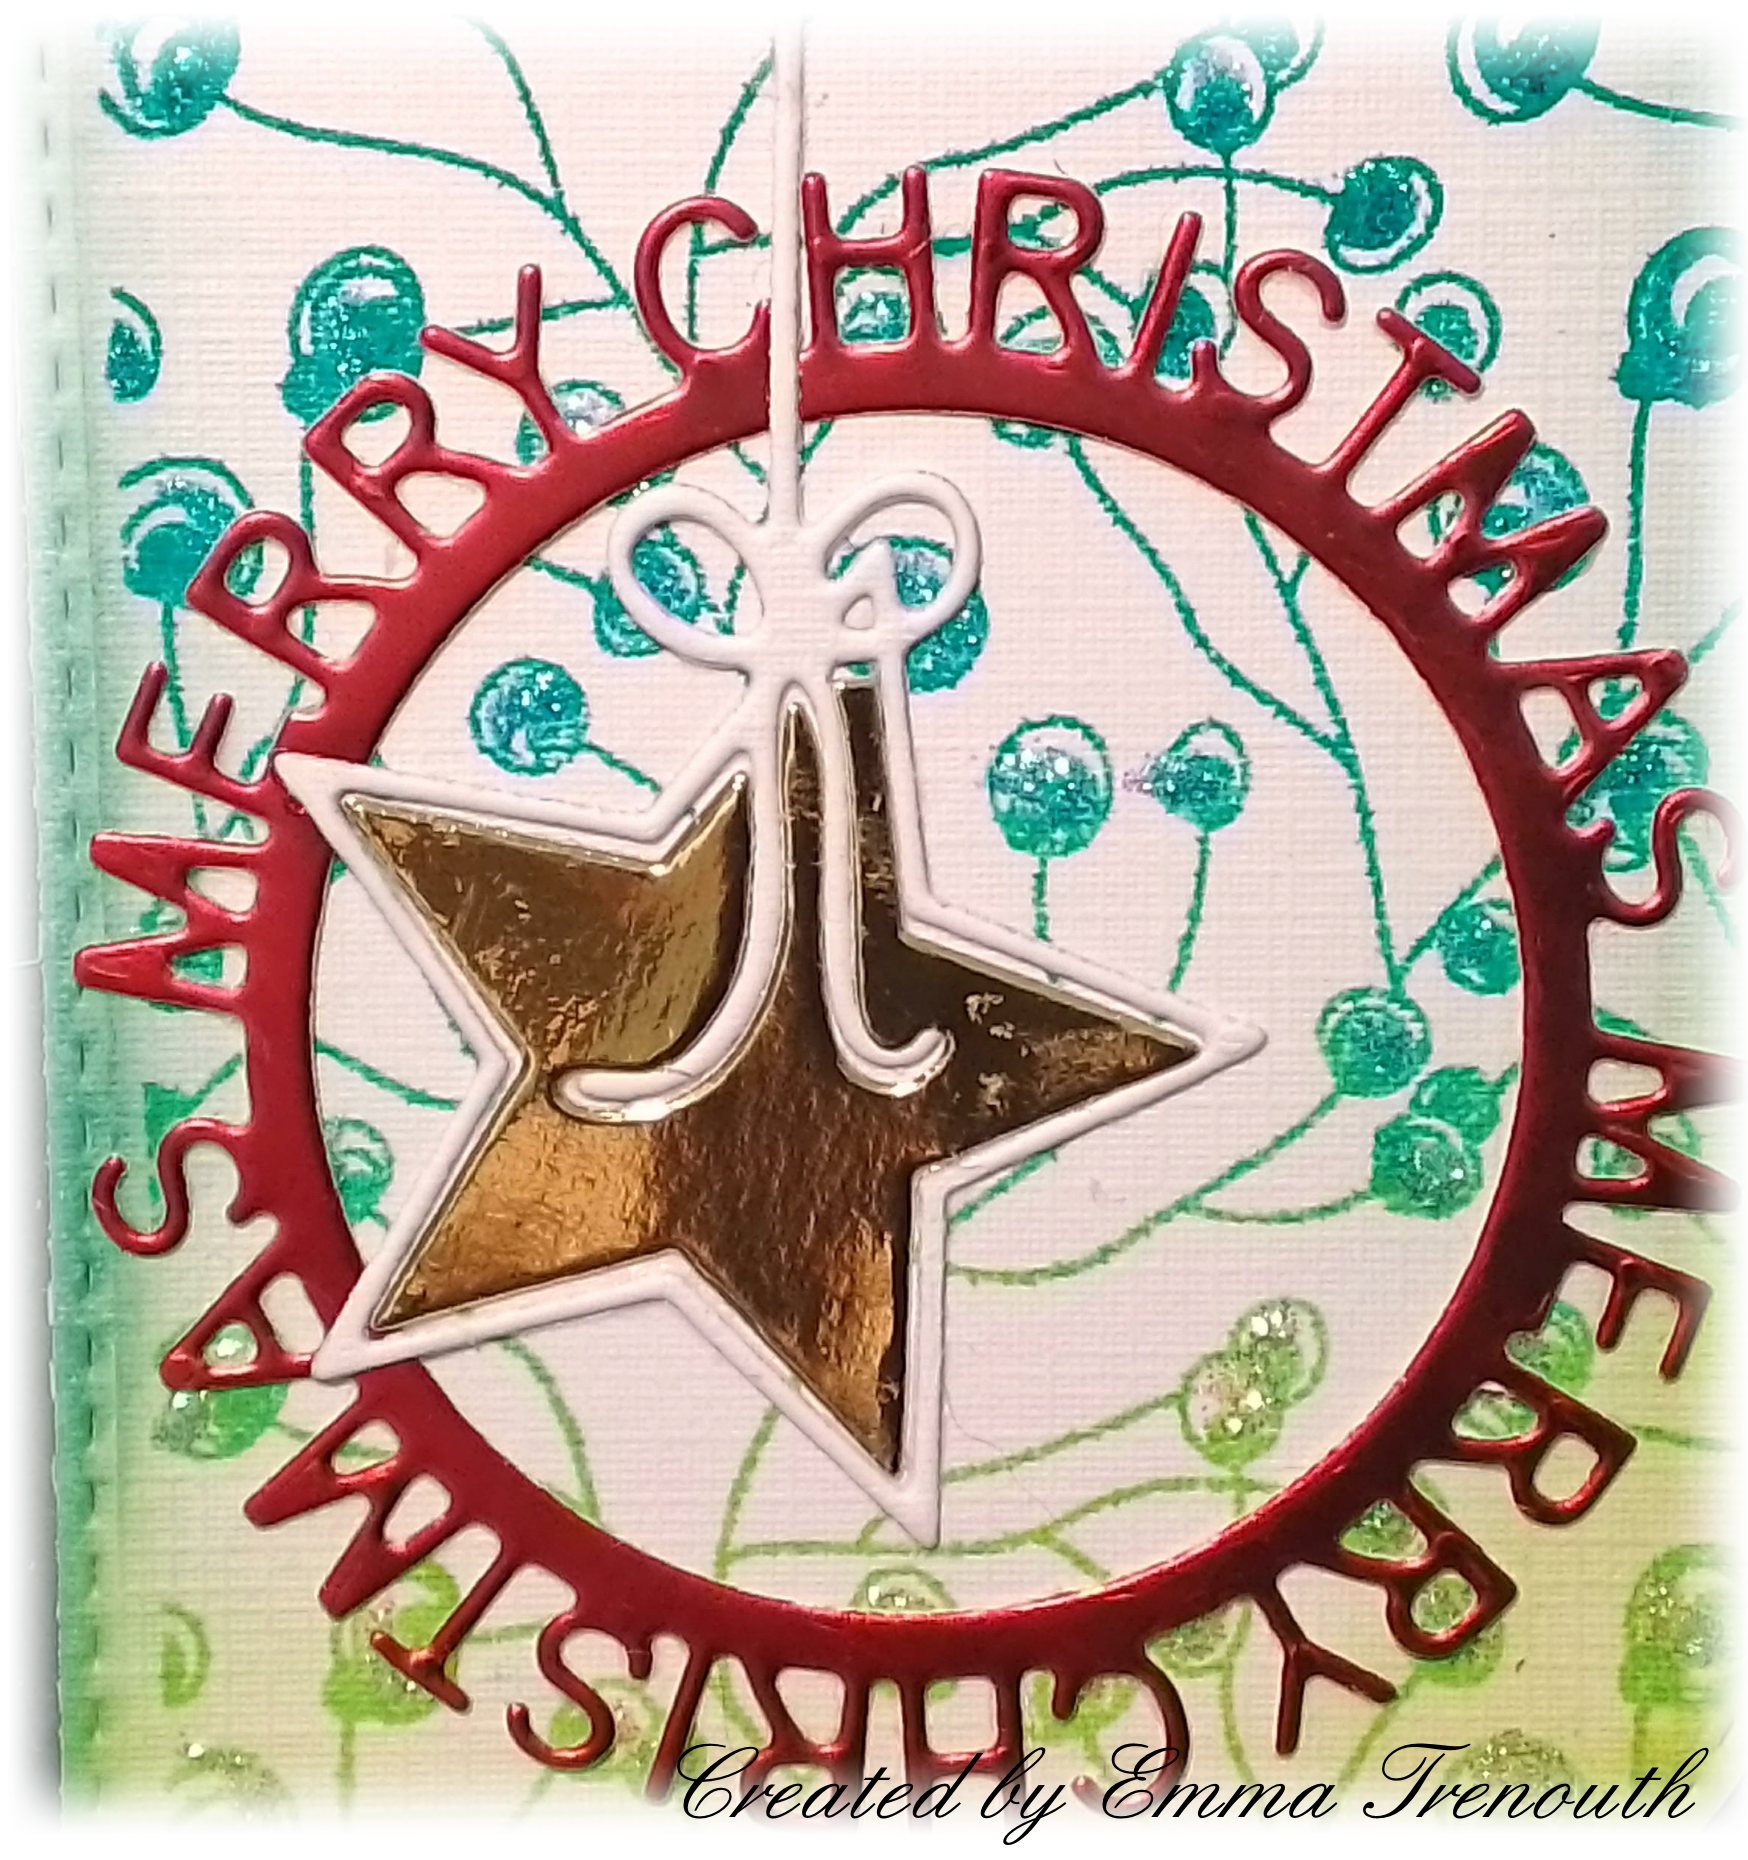
aall&create stamps 'squiggles' #498, MFT christmas sentiment die, star die.   I stamped the berries with a green ombre ink pad and inked the edges with the same ink, matted onto a dark green pearl cardstock and then my white base card.  I then raided my scrap box and die cut the sentiment from red satin card and the star from white and gold mirri card and layered up.  Glitter then added to the berries to finish. 


Sadly the photos don't do the satin & mirror cards justice

This version is gold mirri for the sentiment, red satin for the star outline and gold glitter card for the stars body.

***


Father Christmas


Using Katzelkraft stamps 'reindeer sleigh' 'SOLO144' , hunkydory snowfall acetate I stamped the image and watercoloured with my derwent inktense pencils and cut out.  I used an Ivory violet pearl cardstock for the base, frames and sentiment.  Using a Christmas paper pad from the works (called let it snow) for my inserts which also acted as the background showing through the snowfall acetate on the front. Sentiment is an old magazine freebie which i stamped with a blue ink so softer than black. 

Different colourways

Thank you all for popping by.  I look forward to getting back into blogland and seeing all your creations this year.  Happy Crafting for 2024! Emmax