Followers

Showing posts with label mothers day. Show all posts

Monday, 31 March 2025

Hollyhocks for mum

Good Morning everyone

Today Im sharing the card I made for my mum for Mothering Sunday.  I used metallic flakes, printed acetate and my very old well loved hollyhock die to make a DL card for her.  Nightmare to take photos of though with all the shimmer and shine!

DL (8x4") white linen cardbase which i lightly inked the edged with cracked pistachio and tumbled glass distress inks.  I die cut a lacy panel from white linen card and added to the front.

I adhered a sheet of double side adhesive to white card and on the other side rubbed in the metallic flakes and then die cut them with the hollyhock die.  I die cut foliage from pale blue and pearl teal cardstock.

I have packs of 'clear prints' from stamperia which is very very heavy weight acetate with beautiful printed images, so I die cut a jar from one fo them.  Now this acetate is so thick the die doesn't cut right through but enough that i could then finish cutting it with scissors and get a clean edge.  I added this to the card front with pinflair glue gel and then got arranging the flowers and foliage. 

I added a torn scrap of green paper under the jar to 'ground' it

Side view of the dimension.  I added curve to the hollyhocks with a ball tool

The acetate jar has a lovely shine which adds interest and another texture.  I debated where to put a sentiment but decided against it, I know mum will have this on display for months so doesn't really need a sentiment on the front. 

Here you can really see the colours better, the metallic fakes really are shimmery and gorgeous but I do so hate them! lol

No matter how hard I try every time Ive used guilding flakes or metallic flakes they go everywhere and stick to everything - for weeks afterwards they turn up somewhere, for days the cats had red speckled fur - one even had a red sparkly nose for a few days,  the hoover has a lovely coating of them where they stuck to the warmth of the outside plastic areas.  So I did use the whole pot up in one go adding to adhesive sheets to get it over with - I still have them to use.  I was give the pot as a Christmas present and the effect if beautiful with the different colours in them but yep a product I still Hate to use😒

Items Used
Cosmic shimmer metallic flakes
Stamperia clear prints
Impression Obsession hollyhock die
Jar & foliage dies
Various printed papers 
Distress Inks - tumbled glass, cracked pistachio

Thank you for stopping by once again.  I hope you all have a great week. Emma


Id love to enter the following


Monday, 11 March 2024

Mothers Day

Good Morning everyone

Today is the card i made for my mum for Mothers day yesterday

A5 in size.   I first die cut the poppy die from silver mirror card and then coloured them with alcohol markers in green, orange & red.

I made my white card blank using the largest nesting die.  I then took another piece of white card and embossed with the 3D lace embossing folder, i did the letter press technique and inked one side on the folder with tumbled glass and cracked pistachio distress inks and then run through my machine.  Doesn't show up well in the photo and more noticeable in real life but its gives a subtle background colour. 

I then used the nesting dies and using every other size die to cut the embossed panel into frames.  I adhered the largest outside frame to the card front with 6mm of foam tape, the next size down with 4mm of foam tape and the next size down with 2mm, i then added the smallest piece flat in the middle. This card was hand delivered so i could put as much foam tape & dimension as i liked on it.  Its just a way of adding interest to what is essentially a very simple card. 

I then arranged the mirror card poppies, using 3 of them and cutting up the various stems/flowers to alter them and build them up, i tucked the ends into the frames so it looks like they are growing out of it. 

Stamped sentiment to finish


You can really see the colour on the poppies here, when the light hits the mirror card them really do shimmer and shine. 

Items Used:
Crafters companion 3D embossing folder 'ornate lace'
XL Nesting dies
Pennyblack poppy die
Clearly besotted sentiment stamp
Silver mirror card
Alcohol Markers
CraftUK ltd smooth white cardstock
Distress Inks ' tumbled glass & cracked pistachio'

Thank you all for stopping by.  I hope you have a good week.  Hugs Emmaxx


Id love to enter the following:

**

**

**

**


Monday, 20 March 2023

Crocus for mum

Good Morning everyone

Today im sharing the card Ive made for my mum for Mother's day


Approx size 7x7" I first die cut my cardbase using these fab inverted corner dies and then cut a smaller layer from cardstock coloured with brusho's, from this brusho piece i die cut the memory box circle burst from the middle, i added rose gold mirror card behind this aperture and attached the panel to the base card.  I then die cut 2 frames using the same shape dies and white cardstock, one i adhered flat to the base card and one i added with 2mm foam tape.......I ended up with the smaller inner frame which i added flat as after die cutting my frame I felt the aperture was too big.

I then stamped lots of the Chocolate baroque crocus stamps and watercoloured with distress inks, added some detail with posca pens and then cut them out.  I then got building up the arrangement with glue gel, tucking them behind the frame.  I then added a big bee that i had left over from previous project but it was the ideal touch as mum & I were watching the bees on her crocus the other day. 

Computer printed sentiment die cut into a circle to finish.

Just a close up, this lovely rose gold mirror card is from Crafters companion and the memory box circle burst die is still one of my most used and ive had it about 10yrs now. 

Items Used:
Chocolate Baroque stamps 'spring is in the air' & 'honey bee'
Memory box dies 'circle burst'
Circle & Inverted square dies
Brusho's - turquoise,lime
Distress inks - wild honey, vintage photo, evergreen bough, seedless preserve, shaded lilac
Posca pens - white, lemon, lilac

 Thank you all for popping by once again.  I hope you enjoy the rest of the week and then weekend.  Emmax

Id love to enter the following:

***

***

***

***

***


Monday, 15 March 2021

Happy Mothers Day

 Good Morning everyone, i hope you all had a good weekend. 

Today is the card i made for my Mum for Mothers day, usually i go full on flower power but on seeing this Robin papercuts die thought it would be ideal as she also loves all her garden birds and has loads at the bird feeding area outside the kitchen window, including a few pheasants.  The die is Creative Expressions papercuts under the mistletoe so for Christmas but i think it works just as well all year round and you could easily cut off the mistletoe and you don't just see Robins at Christmas!


Approx 6x5.5" card.  I started with white pearl cardstock, cut to size and then die cut the robins from the front of the card. I then added colour to the robins with oxide inks.  I used a blue paper for my insert to act as the sky for my robins, rounding the top corners.  I die cut a flower from teh same blue paper and foliage from the white pearl card coloured with oxide inks so it all ties nicely together.  Stamped sentiment and large gem to finish.

For the insert i just added a little glue to the front panel and the back so that robins are loose and have movement but protected by the insert from too much damage. 

I can confirm she loved it

Items Used:
Creative Expressions Papercuts die - under the mistletoe
12x12" blue ombre paper - the works
White pearl card
Justrite sentiment stamp
Oxide inks campfire, black soot, pistachio & citron (to make the brown i added a little back to the campfire which i used on their redbreast)


At the bottom of the page is the gift ive made mum, but if you don't like spiders you might not want to look😁    Thank you all for stopping by, i hope you all have a good week. Stay safe. Emmax


Id love to enter the following:


***

***


And this is the gift ive made for mum.  Its for the garden, to go on the shed i thought, a giant 4" beaded spider and a web for him built around a hanging basket bracket, ive added more light catching beads into the web to glint in the light.  Just for something a bit different. 

Its not quite anatomically correct.  I used the large red and gold glass beads and then diamante beads in the legs.

Ive wrapped half hard black wire around the hook adding in a mix of black and silver beads.   Ignore those loose wire ends, once its in place and its decided on the length drop of the spider i will adjust and wire it in properly.  


Sunday, 22 March 2020

Happy Mother's Day


Good Morning Everyone.

Yeah I'm back after 6 weeks without internet after a lightening strike, a long 6 weeks too.

So lets kick start with the card i made for my mum for Mothering Sunday, I went with daffodils as they are one of her fav flowers and made an acetate card blank for a change.


Card size approx 5x6", i first die cut my frame from white card and then worked out what size cardblank i wanted, so cut, scored and folded a piece of acetate to size.  I attached the frame with 2mm foam tape. 
I die cut the daffodils 3 times from white card and coloured with alcohol markers, the first one i kept whole, the second one i cut out the flower heads and the 3rd one i cut the flower centres, after colouring them i used glue gel & decoupaged them to build up dimension. Adding a little green glitter glue for the stamens and a little bling. Then attached them to the card front to look as if they are growing out of the frame.

After going through my vast patterned paper stash for my insert i decided on this lovely vibrant blue to give the feeling of a spring sky to set my daffodils off.  It has a lovely subtle floral pattern.

Computer printed sentiment die cut into an oval to finish.


A close up of my daffs, its not often i colour in with alcohol markers but wanted a really bright cheerful colour.


Showing it side on for the dimension, i added the inner piece that cut out from my white frame to the inside to write my message on.  To hide any glue from showing through my acetate I ensured it was hidden behind attachments, so putting the patterned paper inside hides the glue from the front and i added the glue for the insert behind my frame. Hope that makes sense, got to get back into this typing up mode😀

Items Used:
Daffodil die
Rectangle frame die
Stitched oval die
B&M 12x12 patterned paper 'truly refreshing'
Hunkydory acetate
Lime stickles glitter glue
Alcohol markers
CraftsUK Ltd smooth white card

Thank you for all stopping by, i have lots of new projects to share with you as the bonus to no internet was more crafting time.  Although my mojo needs a little break now to recover from my marathon😎. I shall get around to catching up as i can.  I hope you are all doing on in the madness, hugs to you all. Emmax

***

Id love to enter the following challenges:

http://unicornchallenge.blogspot.com/2020/03/challenge-52-flower-power.html

*****
http://daisychainchallenge.blogspot.com/2020/03/challenge-39-use-dies.html

***


Monday, 1 April 2019

Mother's Day Card

Good Morning one and all.  I hope you had a good weekend.  We had a family get together yesterday which was lovely, my nieces are growing so fast.

Today im sharing the card i made for my mum for Mothering Sunday.  As my regular followers know we love nature and mums veranda over looks the paddock where you can sit and watch the rabbits, pheasants and other wildlife.  Although we don't get many hares in this part of the world, when i saw these amazing lino cut style hares from hobbycraft they fell into my basket.

I wanted a way to get all three hares onto a card and all the extra foliage stamps.  I came up with this tall lean box card.  Full details at the end of the post for it.  I did a topper panel for 2 sides so that it can be rotated to display the other side.  


After making the base card (see below)   I die cut 2 large ovals from white card. On one i first inked through a crazy paving style stencil in an ombre effect in greens and blues with oxide inks.  I love the smooth look the oxides give through a stencil. Starting at the bottom twisted citron, cracked pistachio, peacock feathers & touch of salty ocean at the top.  I then stamped my 2 hares with black archival ink.  I then built a scene around them with the various other stamps in the large set again with black archival ink. 
They are sitting in the meadow under the trees where the tree blossom is falling upon them. Mounted onto a larger black oval die cut. 


A close up on the topper.  For my flower i inked white card with the peacock and salty ocean oxide inks, and then stenciled a pattern over it with the same inks.  This i then die cut into a dimensional flower.  A couple of leaves added behind.  Large black gem to finish and a few glitter highlights on my topper panel.


For the 4 side panels, i cut strips of white and black card to fit each side of the box.  I then used the same oxide inks used throughout to make little scenes using various stamps from the set.  I lightly inked around the edge of the panel, mounted it onto the black and then the side of the box.  I did 2 sides with the green/blue combo and 2 sides with the orange/red combo.


and onto the other side of my box..

I did my topper the same way as the blue one, just using a different stencil with squeezed lemonade,fossilized amber, spiced marmalade & candied apple oxide inks.  This time i started with the lightest shade in the middle, working out to the darkest.  This stencil leaves a circle in the middle so it looked like the setting sun to me, so i went with the warm orange & reds of sunset.  Again i stamped the hare and extras with black archival ink. Flower made the same way.  

I attached each oval opposite each other on the base.  I attached one side and then turned over and flattened the base so i could easily line up on the opposite side.


Just a close up, i added red glitter glue highlights on this side.  


Another side panel, using different stamps.  There are so many stamps in this set so plenty of different ways to build up a scene.  You can see the Hare stamps as clean and beautifully in the oxides as it did the black archival.  Ive left the middle of the panel pale so that i can write my greeting.   Ive also kept the card sentiment free on purpose so that mum can display it for longer if she so wishes, so its kind of a little gift and card in one. 

***

And heres how i made the box base


This shows from the top the box.  I took a sheet of white A4 cardstock, have it landscape, i scored 4 score lines at 2.5" mark, this gives you 4 panels and you have a bit left over for the tab.  Fold all 4 score lines and and form your cube shape and glue the tab to the other side.  Simple really.  Can easily be made any size of height.  I kept the full A4 height so that i had plenty of room.  The benefit is that this card is completely free standing and folds up to fit in an envelope. 


This just shows that it folds flat for posting and it easily pops open again.  p.s She loved it, as did my dad😀

Items Used:
Hobby Art Stamps - CS208D Lino Cut Hares
Spellbinders Grand Oval Dies
Flower & Foliage dies
Tim Holtz Distress Oxide Inks
Plastic Stencils
Payper box black card
CraftUk Ltd Smooth white card
Ranger stickles glitter glue


Thank you all for stopping by once again.  I hope you all have a lovely week whatever your plans are.  Emmax


Id love the enter the following:


Thursday, 15 March 2018

Take One Paper Pad....

Good Morning all, i hope you are having a good week.

Today im showing a batch of cards all made from the same paper pad, after using it for make my mums card for Mothering Sunday i thought it would be a good challenge for me to try and use up all the papers on different cards and in different ways.  I actually enjoyed the challenge.

The paper pad is 6x6" 'On the Bright Side' by My Minds Eye

Its a pad ive had years and loved so used it sparingly as us crafters do. 


This first card i made for mum, 7x7 white cardbase.  I die cut some of the papers with various stitched dies, all matted onto chocolate brown cardstock and layered up.  I die cut the flower from white card so it would stand out against all the busy patterns, i edge it with blue and added blue pearls to the centre.  Die cut mum from white too and then added blue pearls to finish.  


I then made a very similar one for the box just using different papers from the pad and orange pearls.  Im not usually one for adding lots of busy patterns together but found using just bits of them that it wasn't too OTT.


6x6 Chocolate Brown basecard.  New home card.  I die cut various stitched shapes from the papers and layered them up, this first takes a while playing with the shapes and placements until it works for me.  I then stamped the greeting in brown ink onto beige faux leather effect card and mounted onto the card base.   I then die cut my little house from 2 papers and stuck together. 


6x5.5" Brown card base.  I again cut some patterend papers and layered onto chocolate brown cardstock, added onto beige card stamped with the greeting.  I die cut my cat twice, ones from orange and again brown papers and off set so he stands out more. Blue pearls to finish. 


6x6" chocolate brown cardbase.  I had lots of little bits of paper left, not big enough to do much with so cut them into tiny little flowers.  I then die cut green leaves, a stitched rectangle which was left over too made a great flower planter!  All layered onto wood grain paper that also comes from the pads.  Die cut greeting and cat both in the brown.  I added liquid pearls to the flower centres which dried weird with a dent in the middle but after contemplation i think it looks like little seed beads so have left it.


5x7" Brown base.  Lots of papers die cut into various fishtail banners and layered up onto a beige floral pattern paper.  Again it took a while to get an order which worked for me.  Stamped greeting.


4x6" (A6) card, this one used all the left over banners from the first one.  


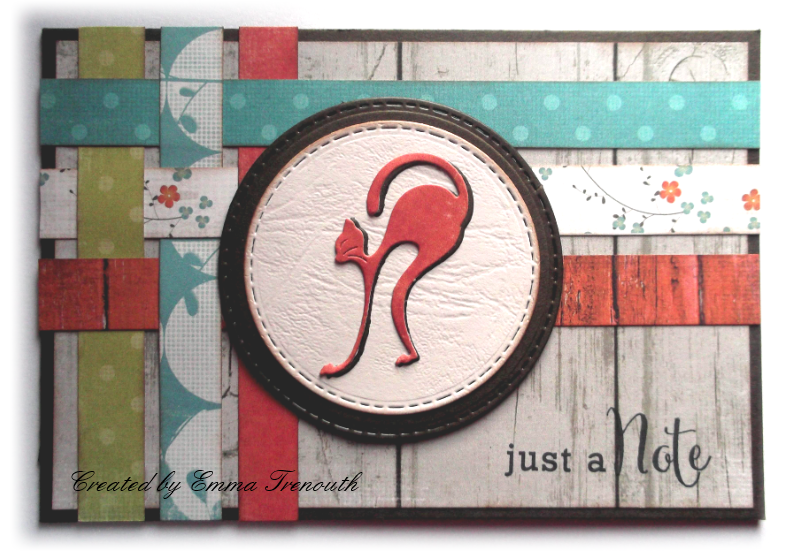
4x6" (A6) card, i had lots of little strips of paper left so did a little weaving, layered onto woodgrain paper.  Die cut cat as before and stamped greeting. 

And last but not least a gift tag, all the little scraps i die cut into banners, as most weren't long enough for the whole length of the die, I just die cut the tips with the fishtail end.  For the vertical strip i cut them off the front cover of the pad - not waste with any of this paper pad.  Ribbon to finish. 

This last card was made for a colour challenge with friends of using apricot, peach, anthracite and ribbon, the papers fitted perfectly instead of the brown card i used a dark pearl grey, i had matching ribbon in my stash and added loops of them along the top and bottom edges of the middle panel.  Die cut sentiment and flower. 

Items Used:
My Minds Eye 'On the Bright side' paper pad
Chocolate brown cardstock, Beige leather cardstock, grey pearl- payper box
Various Stitched dies, squares, rectangle, circle
Flower dies
Cat dies
House die
Pierced & cross stitch fist tail banner die sets
Clearly besotted fancy sentiment stamps


Thank you for stopping by, i hope you all have a lovely weekend. Emma